How To Install Blinds
Installing blinds can transform the look and functionality of any room, providing privacy, light control, and a touch of style to your living space. Whether you're a seasoned DIY enthusiast or a first-time homeowner, learning how to install blinds is a valuable skill that can save you time and money. This comprehensive guide will walk you through the process, ensuring a successful installation that enhances your home's aesthetic appeal and comfort. We'll begin by exploring the essential preparations required before embarking on your blind installation project, including measuring your windows accurately and gathering the necessary tools and materials. Next, we'll delve into a detailed, step-by-step installation process, breaking down each stage to make it easy for anyone to follow. Finally, we'll cover the finishing touches and maintenance tips to keep your newly installed blinds looking and functioning their best for years to come. By following this guide, you'll gain the confidence and knowledge to tackle blind installation like a pro, transforming your windows and elevating your home's interior design. Let's start by examining the crucial preparatory steps that will set the foundation for a smooth and successful blind installation.
Preparing for Blind Installation
Transforming your living space with new window treatments can breathe fresh life into any room, and installing blinds is an excellent way to achieve this. However, the process of preparing for blind installation requires careful planning and attention to detail to ensure a successful outcome. This comprehensive guide will walk you through the essential steps to take before embarking on your blind installation project. We'll begin by exploring the critical importance of measuring your windows accurately, a step that can make or break the entire process. Next, we'll delve into the vast world of blind options, helping you choose the right type that suits both your aesthetic preferences and functional needs. Finally, we'll discuss the necessary tools and materials you'll need to gather before starting the installation, ensuring you're well-equipped for the task at hand. By following these crucial preparatory steps, you'll set yourself up for a smooth and successful blind installation experience. So, let's dive into the world of window treatments and discover how to properly prepare for blind installation, transforming your space with style and precision.
Measuring Your Windows Accurately
Measuring Your Windows Accurately Accurate measurements are the cornerstone of successful blind installation, ensuring a perfect fit and optimal functionality. Before you begin the measurement process, gather the necessary tools: a metal tape measure, a pencil, and a notepad. It's crucial to use a metal tape measure rather than a fabric one, as the latter can stretch and lead to inaccurate measurements. Start by deciding whether you want an inside mount or an outside mount for your blinds. Inside mounts fit within the window frame, creating a sleek, built-in look, while outside mounts cover the entire window and can make it appear larger. For inside mounts, measure the width of the window opening at three points: the top, middle, and bottom. Record the narrowest measurement, as this will ensure your blinds fit within the frame. Next, measure the height at the left, center, and right sides of the window, noting the longest measurement. For outside mounts, measure the width of the area you want the blinds to cover, typically extending 1.5 to 3 inches beyond the window frame on each side. Measure the height from the top of where you want the headrail to sit down to where you want the blinds to end. When measuring for specialty windows, such as bay windows or arched tops, consult the manufacturer's guidelines or seek professional advice. For bay windows, treat each section as a separate window and measure accordingly. For arched windows, measure the width at the widest point and the height from the top of the arch to the windowsill. Remember to measure each window individually, even if they appear identical, as slight variations can occur. Double-check all measurements to avoid costly mistakes. If you're unsure about your measurements, many blind retailers offer professional measuring services to ensure accuracy. It's also important to consider the depth of your window frame, especially for inside mounts. Measure the depth from the front of the frame to the glass or any obstructions like handles or locks. This measurement is crucial for determining if your chosen blinds will fit properly within the frame. Lastly, when recording your measurements, always write down the width first, followed by the height, and clearly indicate which window each measurement corresponds to. This practice will help prevent confusion when ordering your blinds and during the installation process. By taking the time to measure your windows accurately, you set the foundation for a smooth and successful blind installation that will enhance the look and functionality of your space for years to come.
Choosing the Right Type of Blinds
When preparing for blind installation, one of the most crucial steps is choosing the right type of blinds for your space. This decision can significantly impact not only the aesthetics of your room but also its functionality and energy efficiency. With a wide array of options available, it's essential to consider various factors to ensure you select the perfect blinds for your needs. First, consider the purpose of the blinds. Are you looking for light control, privacy, or both? For rooms that require maximum darkness, such as bedrooms or home theaters, blackout blinds or cellular shades are excellent choices. If you're more concerned with privacy while still allowing some natural light, consider semi-opaque roller shades or wooden blinds. Next, think about the style and decor of your room. Venetian blinds, with their classic horizontal slats, offer a timeless look that complements various interior designs. For a more modern aesthetic, sleek roller blinds or minimalist panel track blinds might be more appropriate. If you're aiming for a natural, organic feel, bamboo or woven wood shades can add warmth and texture to your space. The size and shape of your windows also play a crucial role in blind selection. For large windows or sliding glass doors, vertical blinds or panel track systems are often the most practical choices. For uniquely shaped windows, such as arches or circles, custom-made cellular shades or shutters can provide a tailored solution. Energy efficiency is another important consideration, especially for windows that receive direct sunlight. Cellular shades, also known as honeycomb blinds, are excellent insulators, helping to keep your room cool in summer and warm in winter. Similarly, solar shades can block harmful UV rays while still allowing some visibility. Don't forget about ease of maintenance. If you prefer low-maintenance options, faux wood blinds or vinyl roller shades are easy to clean and resistant to moisture, making them ideal for bathrooms or kitchens. On the other hand, if you don't mind a bit more upkeep, natural materials like real wood or fabric can add a touch of luxury to your space. Lastly, consider your budget. While custom-made blinds offer the perfect fit and finish, they can be more expensive. Ready-made blinds are more budget-friendly but may require some compromises in terms of size or style. Remember that investing in quality blinds can pay off in the long run through improved energy efficiency and durability. By carefully considering these factors – purpose, style, window size and shape, energy efficiency, maintenance, and budget – you'll be well-equipped to choose the right type of blinds for your space. This thoughtful selection process will ensure that your new blinds not only look great but also function perfectly, setting the stage for a successful installation and years of satisfaction with your window treatments.
Gathering Necessary Tools and Materials
Before embarking on your blind installation project, it's crucial to gather all the necessary tools and materials. This preparation step ensures a smooth, efficient process and helps you avoid frustrating interruptions mid-installation. Begin by carefully reviewing the manufacturer's instructions that came with your blinds, as they often provide a comprehensive list of required tools and hardware specific to your model. For most blind installations, you'll need a few essential tools. A tape measure is indispensable for accurately measuring your window dimensions and marking mounting bracket positions. A pencil is useful for making these marks, while a level ensures your blinds will hang straight and look professional. A drill with various drill bits is typically necessary for creating pilot holes and securing mounting brackets. Don't forget a screwdriver – both flathead and Phillips head types may be needed, depending on the screws provided with your blinds. Safety should always be a priority, so be sure to have protective eyewear and a sturdy step ladder or step stool on hand, especially for higher windows. If you're working with metal blinds or need to trim your blinds to fit, you might also need a hacksaw and a pair of sturdy work gloves to protect your hands from sharp edges. As for materials, check that your blinds package includes all necessary mounting hardware, such as brackets, screws, and anchors. If you're installing blinds in a damp area like a bathroom, consider using rust-resistant screws. For wooden window frames, you may need wood filler to conceal screw holes after installation. If you're mounting blinds outside the window frame, you might require a valance or fascia to create a finished look. It's always wise to have a few extra tools and materials on hand. A stud finder can be invaluable if you're mounting heavy blinds and need to locate wall studs for added support. Wire cutters might be necessary for cutting excess cord on some blind styles. A vacuum cleaner or hand brush will help you clean up any debris from drilling. By gathering all these tools and materials before you start, you'll create an organized workspace and set yourself up for a successful installation. Take the time to double-check your supplies against the manufacturer's list and consider any unique aspects of your windows or home that might require additional tools. With thorough preparation, you'll be well-equipped to tackle your blind installation project with confidence and ease.
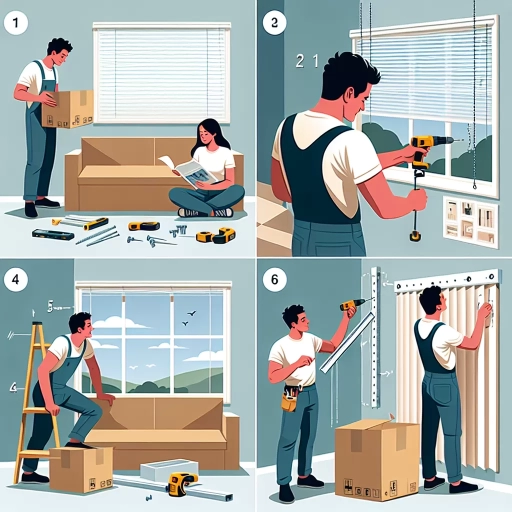
Step-by-Step Installation Process
Installing window blinds can transform the look and functionality of any room, providing privacy, light control, and a polished aesthetic. While the process may seem daunting at first, with the right guidance and tools, you can successfully install blinds in your home. This comprehensive guide will walk you through the step-by-step installation process, ensuring a professional-looking result. We'll cover three crucial aspects of blind installation: installing mounting brackets, attaching the headrail or valance, and hanging and adjusting the blind slats. Each of these steps plays a vital role in achieving a secure and visually appealing window treatment. By following our detailed instructions, you'll gain the confidence to tackle this home improvement project with ease. Whether you're working with vertical blinds, horizontal blinds, or cellular shades, the principles remain similar, and this guide will help you navigate the installation process smoothly. Before we delve into the specifics of each step, let's start by preparing for the blind installation, ensuring you have all the necessary tools and materials at hand to set yourself up for success.
Installing Mounting Brackets
Installing Mounting Brackets The installation of mounting brackets is a crucial step in the process of hanging your new blinds. These small but essential hardware components serve as the foundation for your window treatment, ensuring stability and proper functionality. To begin, carefully unpack the mounting brackets included with your blinds and inspect them for any damage or defects. You'll typically find two types of brackets: an "L" shaped bracket for inside mount installations and a flat bracket for outside mount installations. Before proceeding, double-check that you have the correct number of brackets for your window size and blind width. For inside mount installations, position the brackets inside the window frame, ensuring they're level and aligned with the top of the frame. Use a pencil to mark the screw holes, then set the brackets aside. If you're working with an outside mount, hold the brackets against the wall or window trim, making sure they're level and positioned at the desired height. Again, mark the screw holes with a pencil. It's crucial to use a level during this step to guarantee your blinds will hang straight and operate smoothly. Next, pre-drill pilot holes at the marked locations using a drill bit slightly smaller than your mounting screws. This step prevents the wood from splitting and makes it easier to drive the screws. If you're mounting to drywall, insert wall anchors into the pilot holes for added support. For masonry surfaces, use appropriate masonry anchors and a hammer drill to create the holes. With the pilot holes prepared, align the brackets with the holes and secure them using the provided screws. Be careful not to overtighten the screws, as this can damage the brackets or the mounting surface. For inside mounts, ensure the brackets are flush with the top of the window frame. For outside mounts, verify that the brackets are level and aligned with each other. Some blinds may require additional support brackets, especially for wider windows. These should be spaced evenly between the two end brackets to distribute the weight of the blinds properly. Follow the manufacturer's guidelines for the correct placement of support brackets. Once all brackets are securely fastened, give them a gentle tug to ensure they're firmly attached. This is also a good time to check once more that the brackets are level and properly aligned. Taking the time to install your mounting brackets correctly will pay off in the long run, as it sets the stage for a smooth and hassle-free blind installation process. With the brackets in place, you're now ready to move on to the next step of hanging your new blinds, bringing you one step closer to enhancing your home's privacy and style.
Attaching the Headrail or Valance
Attaching the Headrail or Valance The final step in installing your blinds is attaching the headrail or valance, which not only completes the functional aspect of your window treatment but also adds a polished, aesthetic finish to your newly installed blinds. This crucial step requires precision and care to ensure a secure fit and seamless appearance. For most blinds, the headrail is the primary component that houses the lifting mechanism and supports the entire blind structure. Begin by carefully lifting the headrail and aligning it with the mounting brackets you've previously installed. Depending on the specific design of your blinds, you may need to tilt the headrail at a slight angle to hook it onto the front of the brackets. Once the front is secured, gently push the back of the headrail upward until you hear a distinctive click, indicating that it's locked into place. Double-check the security of the attachment by giving the headrail a gentle tug – it should remain firmly in position. If your blinds come with a separate valance, this decorative piece is typically installed after the headrail is in place. Valances serve to conceal the mounting hardware and add a finished look to your window treatment. Most valances attach to the headrail using clips or hooks provided with the blinds. Carefully snap or slide these attachments into place, ensuring they're evenly spaced across the width of the window for a balanced appearance. For more elaborate window treatments, such as Roman shades or cellular shades, the headrail might incorporate both the functional mechanism and the decorative element in one piece. In these cases, the installation process remains similar, but you'll want to take extra care to avoid damaging the fabric or pleats as you secure the headrail to the mounting brackets. It's essential to ensure that the headrail or valance is level once installed. Use a spirit level to check, and make any necessary adjustments to the mounting brackets if you notice any unevenness. A properly leveled headrail not only looks better but also ensures smooth operation of the blinds. Finally, step back and admire your handiwork. With the headrail or valance securely in place, your blinds should now be fully functional and visually appealing. Take a moment to test the lifting and lowering mechanism, as well as any tilt functions, to confirm everything is working correctly. If you encounter any issues, consult the manufacturer's instructions or consider seeking professional assistance to address any complications. Remember, the headrail and valance are not just functional components but also contribute significantly to the overall aesthetics of your window treatment. Taking the time to attach them properly will ensure your blinds look great and function smoothly for years to come.
Hanging and Adjusting the Blind Slats
Hanging and Adjusting the Blind Slats Once you have securely mounted the headrail, it's time to focus on hanging and adjusting the blind slats, a crucial step that ensures both functionality and aesthetic appeal. Begin by carefully unpacking the slats, taking care not to bend or damage them. If your blinds came with the slats pre-strung, gently unroll them, making sure they don't tangle. For blinds that require manual stringing, refer to the manufacturer's instructions for the correct threading pattern. Start by attaching the bottommost slat to the bottom rail, which provides weight and stability to the entire blind structure. Most designs feature clips or hooks for easy attachment. Work your way up, hanging each slat on the ladder cords or tapes at evenly spaced intervals. As you progress, periodically check that the slats are level and properly aligned. This attention to detail will ensure a polished look and smooth operation once installed. For vertical blinds, the process is slightly different. You'll need to attach each individual slat to the tracking system in the headrail. Most vertical blinds use a simple clip-in mechanism, allowing you to snap each slat into place with minimal effort. Ensure that all slats are facing the same direction and are evenly spaced for a uniform appearance. Once all slats are in place, it's time to fine-tune their positioning. For horizontal blinds, adjust the lift cords to ensure the bottom rail is level and the slats stack neatly when raised. Test the tilting mechanism to verify that all slats rotate smoothly and in unison. If you notice any sticking or misalignment, gently manipulate the affected slats to correct the issue. For vertical blinds, check that each slat hangs straight and rotates freely. Adjust the weights at the bottom of each slat if necessary to maintain proper alignment. Many vertical blinds also feature a traversing wand or cord, which allows you to bunch the slats to one side. Test this mechanism to ensure smooth operation and make any needed adjustments to the tracking system. Throughout the process, pay attention to any safety features, such as cordless systems or breakaway cords, ensuring they are properly set up according to the manufacturer's guidelines. These features are especially important in homes with young children or pets. By taking the time to carefully hang and adjust your blind slats, you'll not only achieve a professional-looking installation but also ensure optimal functionality and longevity of your window treatment. Remember, patience and attention to detail during this step will pay off in the form of beautifully dressed windows that enhance your living space for years to come.
Finishing Touches and Maintenance
When it comes to enhancing your home's aesthetic appeal and functionality, installing new blinds can make a world of difference. However, the process doesn't end with simply hanging them up. The finishing touches and ongoing maintenance are crucial aspects that ensure your blinds look great and function optimally for years to come. This comprehensive guide will walk you through the essential steps to complete your blind installation project and keep your new window treatments in top condition. We'll explore three key areas: installing child safety devices to protect your little ones, proper care and cleaning techniques to maintain the beauty and longevity of your blinds, and troubleshooting common installation issues that may arise. By addressing these important aspects, you'll be able to enjoy your new blinds to their fullest potential while ensuring they remain safe, clean, and functional. Before we delve into these finishing touches and maintenance tips, it's important to note that proper preparation is the foundation of a successful blind installation. Let's begin by discussing how to prepare for your blind installation project, setting the stage for a smooth and satisfying experience.
Installing Child Safety Devices
Installing child safety devices on your blinds is a crucial step in ensuring the safety of young children in your home. These devices are designed to prevent accidents and injuries associated with window coverings, particularly the risk of strangulation from loose cords. When installing blinds, it's essential to consider child safety as part of the finishing touches and ongoing maintenance. There are several types of child safety devices available for different styles of blinds. Cord cleats are simple yet effective tools that allow you to wrap excess cord around them, keeping it out of reach of children. For venetian blinds or other styles with continuous loop cords, cord tensioners can be installed to keep the cord taut and close to the wall. Breakaway tassels are another option, designed to separate when pressure is applied, reducing the risk of entanglement. When installing these devices, it's important to follow the manufacturer's instructions carefully. Cord cleats should be mounted high enough to be out of a child's reach, typically at least 1.6 meters (about 5 feet) from the floor. Ensure they are securely fastened to the wall or window frame using appropriate screws or anchors. Cord tensioners should be installed so that the cord is pulled taut, eliminating any slack that could form a dangerous loop. For motorized blinds, consider opting for a cordless operation system or ensuring that any control cords are kept well out of reach. Some modern blinds come with built-in safety features, such as retractable cords or cordless lifting mechanisms, which are excellent choices for homes with young children. It's not enough to simply install these devices; regular maintenance and checks are crucial. Periodically inspect all cords and chains for wear and tear, replacing them if necessary. Ensure that tensioners and cleats remain securely fastened and continue to function as intended. As children grow, reassess the placement of safety devices to ensure they remain effective. Educating all family members and caregivers about the importance of these safety measures is also vital. Demonstrate how to use cord cleats and tensioners properly, and emphasize the importance of keeping furniture away from windows to prevent children from climbing and accessing cords. Remember, while child safety devices significantly reduce risks, they should not be considered a substitute for supervision. Always keep a watchful eye on young children around window coverings. By incorporating these safety measures into your blind installation and maintenance routine, you create a safer environment for children while still enjoying the functional and aesthetic benefits of your window treatments.
Proper Care and Cleaning of Your New Blinds
Proper Care and Cleaning of Your New Blinds Once you've successfully installed your new blinds, it's essential to maintain them properly to ensure their longevity and keep them looking their best. Regular care and cleaning not only enhance the appearance of your blinds but also contribute to their durability and functionality. Different types of blinds require specific cleaning methods, so it's crucial to follow the manufacturer's guidelines for optimal results. For most blinds, a simple weekly dusting routine can go a long way in preventing the buildup of dirt and allergens. Use a microfiber cloth, feather duster, or vacuum cleaner with a soft brush attachment to gently remove dust from both sides of the slats. When dusting vertical blinds, work from top to bottom to avoid dislodging the slats from their tracks. For horizontal blinds, close the slats in one direction to clean, then reverse them to clean the other side. If your blinds require more thorough cleaning, consider spot-cleaning or deep-cleaning methods. For spot-cleaning, use a mild detergent solution and a soft cloth to gently remove stains or marks. Be careful not to saturate the blinds, especially if they're made of wood or fabric. For deep-cleaning, you may need to remove the blinds and soak them in a bathtub filled with warm water and mild detergent. This method works well for vinyl, aluminum, or plastic blinds but should be avoided for wooden or fabric blinds. Wooden blinds require special care to prevent warping or damage. Use a slightly damp cloth to wipe them down, followed by a dry cloth to remove any excess moisture. Avoid using excessive water or harsh cleaning products, as these can damage the wood's finish. For fabric blinds, such as Roman shades or cellular shades, regular vacuuming with a soft brush attachment is usually sufficient. If deeper cleaning is necessary, consider professional cleaning services to avoid damaging the delicate fabric. In addition to regular cleaning, inspect your blinds periodically for any signs of wear or damage. Check the cords, strings, and mechanisms to ensure they're functioning correctly. If you notice any fraying, tangling, or difficulty in operation, address these issues promptly to prevent further damage or safety hazards. By incorporating these care and cleaning practices into your routine, you'll not only maintain the aesthetic appeal of your blinds but also extend their lifespan. Well-maintained blinds continue to provide privacy, light control, and insulation benefits, making your investment worthwhile for years to come. Remember, a little regular maintenance goes a long way in preserving the beauty and functionality of your newly installed blinds.
Troubleshooting Common Installation Issues
Troubleshooting Common Installation Issues Even with careful planning and execution, you may encounter some challenges during the blind installation process. Addressing these issues promptly and effectively can save time and ensure a successful outcome. One common problem is uneven hanging, where the blind appears tilted or doesn't sit flush against the window frame. This can often be rectified by double-checking the mounting brackets' alignment and ensuring they're securely fastened. If the issue persists, you may need to adjust the cord lock mechanism or balance the slats manually. Another frequent concern is difficulty in raising or lowering the blinds smoothly. This can be caused by tangled cords, a misaligned pulley system, or debris in the headrail. Carefully inspect the cords for knots or twists, and gently untangle them if necessary. Clean the headrail thoroughly, removing any dust or debris that might impede the mechanism's movement. If the problem continues, lubricating the moving parts with a silicone-based spray can often restore smooth operation. Light gaps along the edges of the blinds can be frustrating, especially in bedrooms where darkness is desired. These gaps may occur due to improper measuring or installation. To address this, consider adding side channels or light-blocking strips to minimize light penetration. Alternatively, opting for outside-mount blinds can provide better coverage and reduce light leakage. Sometimes, newly installed blinds may not retract fully or evenly. This issue can be caused by incorrect cord tension or uneven distribution of the blind's weight. Adjust the cord tension according to the manufacturer's instructions, and ensure that the blind is level when fully extended. For motorized blinds, recalibrating the motor or reprogramming the remote control may resolve retraction problems. Rattling or vibrating blinds can be bothersome, especially in windy conditions or near frequently opened windows. This can often be remedied by installing hold-down brackets at the bottom of the blinds or using magnetic strips to secure them more firmly against the window frame. If you encounter persistent issues that you're unable to resolve, don't hesitate to consult the manufacturer's troubleshooting guide or contact their customer support. Many companies offer warranty services or can provide expert advice tailored to your specific blind model. Remember that proper installation is crucial for the longevity and functionality of your blinds, so taking the time to address any issues early on will ensure you can enjoy your new window treatments for years to come. By familiarizing yourself with these common installation issues and their solutions, you'll be better equipped to handle any challenges that arise during the process. With patience and attention to detail, you can overcome these obstacles and achieve a polished, professional-looking blind installation that enhances the beauty and functionality of your living space.