How To Tape An Ankle
Understanding The Basics Of Ankle Taping
Importance of Ankle Taping
Many sports and physical activities carry a significant risk of ankle injury, with sprains being particularly common. Therefore, it is essential to protect this part of the body, and ankle taping is a practical solution. The process of taping anchors the ankle, limiting its mobility and reducing the likelihood of twisting or turning it in a way that could lead to injury. The security offered by neatly applied tape allows athletes to move with confidence, regardless of the intensity of the activity.
Identifying the Appropriate Tape
Selecting the right tape for your ankle is crucial. There are different types of sports tape available in the market, and understanding their unique properties will help you make the best decision. Adhesive tapes, for instance, are commonly used because they provide excellent support and are easy to apply. However, athletes with sensitive skin may prefer non-adhesive tapes to avoid skin irritation. Cohesive tapes, on the other hand, only stick to themselves and not to the skin. They are suitable for applications where flexibility is required.
Pre-Taping Procedures
Before starting the taping process, you need to ensure that the foot and ankle are clean and dry. Any moisture can cause the tape to loosen and potentially trigger blisters. Also, pre-wrap can be used to protect the skin from direct contact with the tape, minimizing the risk of irritation. It's important to inspect the ankle for any signs of injury prior to taping; if you suspect an existing injury, it's advisable to seek medical attention before moving forward with taping to prevent any further damage.
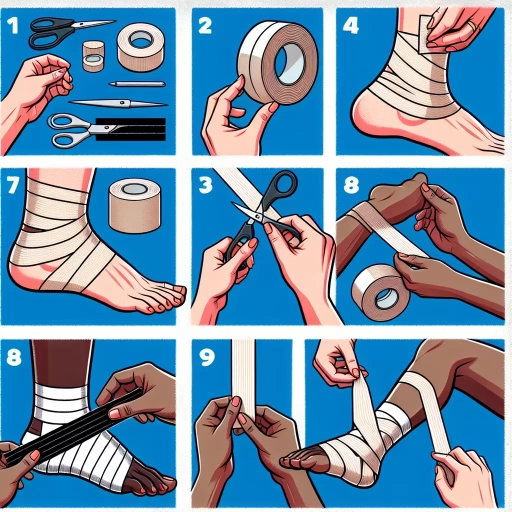
Step-By-Step Guide To Ankle Taping
Taping the Anchor
Start by holding the roll of tape in one hand, and with the other, apply a strip of tape around the lower part of the calf, just above the ankle. This strip of tape will serve as an 'anchor' from which other pieces of tape will be connected. Make sure that the tape is applied evenly and is just tight enough to maintain its position without cutting off circulation.
Taping the Stirrups
After the anchor is in place, it's time to create the 'stirrups.' Extend a strip of tape from the inside of the anchor, take it under the foot, and attach it to the outer part of the anchor, creating a U-shape. Repeat this process 2-3 times to ensure proper support. The stirrups limit side-to-side movement, preventing sprains.
Creating the Heel Locks
Heel locks are crucial for providing stability and restricting movement. They are formed by starting a strip of tape on one side of the anchor, wrapping it down behind the heel, looping it over the top of the foot, and then bringing it back around the opposite side of the heel. Perform this step in both directions – horizontally and vertically – to ‘lock’ the heel and reduce the chance of a sprain or strain.
Post-Taping Tips And Practices
Checking for Comfort and Mobility
After the taping process, it's important to ensure that movement is comfortable. If the tape is too tight or if there is any discomfort, it may be necessary to adjust or entirely redo the taping. Additionally, it's essential to verify that the support is effective by testing the mobility of the ankle. The primary goal of the taping is to strike a balance between mobility and support.
Maintaining and Updating Your Tape
Tape can lose its functionality over time due to wear, sweat, or physical contact. As a result, it's important to check the tape periodically and replace it as necessary. A good rule of thumb is to replace athletic tape every 3-4 hours, or if it becomes wet, for optimal support.
Removing the Tape
While removing the tape, care must be taken to avoid injuring the skin. It's recommended to use a specialized cutter tool or scissors. It's also crucial to minimize direct contact between the cutting tool and the skin to avoid injury. Keep in mind that regular replacement and proper removal of the tape are vital to keeping your ankle protected and safe from injury.