How To Screen Shot On Hp
Taking a screenshot on an HP computer is a straightforward process that can be accomplished using various methods, depending on the desired outcome. Whether you need to capture a single window, a full screen, or a specific region, there are built-in tools and techniques that make it easy to do so. In this article, we will explore three different methods for taking a screenshot on an HP computer: using the Windows Snipping Tool, using the Game Bar to capture screenshots, and using the Print Screen button. These methods offer different levels of control and flexibility, allowing you to choose the one that best suits your needs. We will begin by exploring the simplest and most widely used method, which involves using the Print Screen button, a feature that is available on all HP computers.
Using the Print Screen Button
Using the Print Screen button on your HP keyboard is a simple and effective way to capture screenshots of your desktop or laptop screen. This feature is especially useful for creating tutorials, saving important information, or sharing images with others. In this article, we will explore how to use the Print Screen button to capture a screenshot, including locating the button on your HP keyboard, pressing the button to capture the screenshot, and using the Windows Snipping Tool to edit and save the image. By following these steps, you can easily capture and save screenshots using the Print Screen button. So, let's start by locating the Print Screen button on your HP keyboard.
Locating the Print Screen Button on Your HP Keyboard
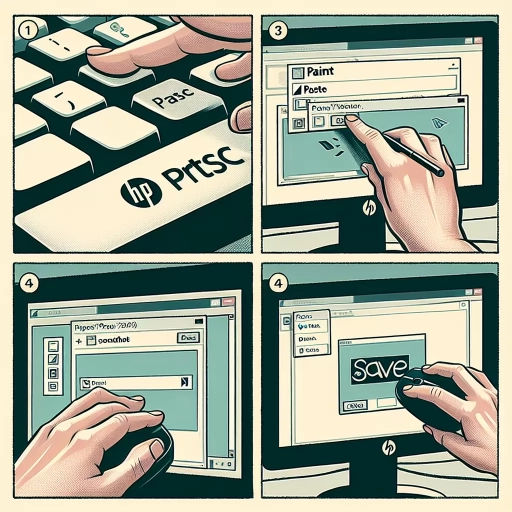
The Print Screen button, often abbreviated as PrtScn or PrtScr, is usually located on the top row of an HP keyboard, between the F12 key and the Scroll Lock key. However, the exact location may vary depending on the specific model of your HP keyboard. On some HP laptops, the Print Screen button might be combined with another key, such as the Fn (Function) key, and you may need to press the Fn key in conjunction with the PrtScn key to activate the print screen function. To locate the Print Screen button on your HP keyboard, look for the following: check the top row of keys, inspect the keys on the right-hand side of the keyboard, and verify if the PrtScn key is combined with another key. If you're still having trouble finding the Print Screen button, consult your HP keyboard manual or search online for specific instructions for your keyboard model.
Pressing the Print Screen Button to Capture a Screenshot
Pressing the Print Screen button is a simple and effective way to capture a screenshot on your HP device. When you press the Print Screen button, it captures the entire screen and saves it to the clipboard. You can then paste the screenshot into an image editing program, such as Microsoft Paint, to save and edit it. The Print Screen button is usually located on the top row of keys on your keyboard, often abbreviated as "PrtScn" or "PrtScr". To capture a screenshot using the Print Screen button, simply press the button and then open an image editing program to paste the screenshot. You can also use the Windows key + Print Screen button combination to capture a screenshot and automatically save it to the "Screenshots" folder in your Pictures folder. This method is quick and easy, and it's a great way to capture screenshots of your entire screen or a specific window.
Using the Windows Snipping Tool to Edit and Save the Screenshot
Using the Windows Snipping Tool to edit and save the screenshot is a convenient alternative to the Print Screen button. To access the Snipping Tool, type "snipping tool" in the Windows search bar and open the application. Once open, you can choose from four different snip types: Full Screen, Window, Rectangular Snip, and Free-form Snip. Select the desired snip type and capture the screenshot. The Snipping Tool will then open the screenshot in a new window, allowing you to edit and annotate the image using the available tools, such as the pen, highlighter, and eraser. You can also add text and arrows to highlight important information. Once you've edited the screenshot, you can save it as an image file, such as a JPEG or PNG, by clicking on the "File" menu and selecting "Save As." Additionally, you can also copy the screenshot to the clipboard and paste it into an email or document. The Snipping Tool also allows you to delay the screenshot capture by up to 5 seconds, giving you time to prepare the screen before capturing the image. Overall, the Snipping Tool provides more flexibility and editing options compared to the Print Screen button, making it a useful tool for capturing and editing screenshots on your HP computer.
Using the Windows Snipping Tool
The Windows Snipping Tool is a powerful utility that allows users to capture and edit screenshots with ease. With this tool, you can select the desired screenshot mode, capture the image, and then edit and annotate it as needed. In this article, we will explore the different features and functions of the Snipping Tool, and provide a step-by-step guide on how to use it effectively. We will start by discussing how to open the Snipping Tool on your HP computer, followed by selecting the screenshot mode and capturing the image, and finally, editing and annotating the screenshot with the Snipping Tool. By the end of this article, you will be able to use the Snipping Tool with confidence and take your screenshot game to the next level. To get started, let's first take a look at how to open the Snipping Tool on your HP computer.
Opening the Snipping Tool on Your HP Computer
Here is the paragraphy: To open the Snipping Tool on your HP computer, you can follow these simple steps. First, click on the Start button located at the bottom left corner of your screen. This will open the Start menu, where you can search for the Snipping Tool. Type "Snipping Tool" in the search bar, and it should appear in the search results. Click on the Snipping Tool icon to open the application. Alternatively, you can also find the Snipping Tool in the Accessories folder. To do this, click on the Start button, then click on "All Programs" or "All Apps," and navigate to the Accessories folder. The Snipping Tool should be listed there. Once you've opened the Snipping Tool, you can choose from four different snip types: Full Screen, Window, Rectangular Snip, and Free-form Snip. You can then use the tool to capture a screenshot of your desired area. The Snipping Tool also allows you to annotate and highlight your screenshots, making it a useful tool for creating tutorials, presentations, and other visual content.
Selecting the Screenshot Mode and Capturing the Image
When it comes to selecting the screenshot mode and capturing the image using the Windows Snipping Tool, there are several options to choose from. The tool offers four different modes: Full Screen, Window, Rectangular Snip, and Free-form Snip. The Full Screen mode captures the entire screen, including all windows and the taskbar. The Window mode allows you to capture a specific window, such as a browser or document. The Rectangular Snip mode enables you to capture a rectangular area of the screen by dragging the crosshair pointer. The Free-form Snip mode allows you to capture any shape or area of the screen by drawing around it with the crosshair pointer. To select the screenshot mode, simply click on the mode you want to use from the toolbar or press the corresponding keyboard shortcut. Once you've selected the mode, you can capture the image by clicking the "New" button or pressing the Enter key. The captured image will then be displayed in the Snipping Tool window, where you can edit, annotate, and save it as needed.
Editing and Annotating the Screenshot with the Snipping Tool
When it comes to editing and annotating screenshots, the Snipping Tool offers a range of features that make it easy to enhance and customize your images. After capturing a screenshot using the Snipping Tool, you can edit it by opening it in the Snipping Tool window. From here, you can use the tools in the toolbar to make adjustments to the image, such as cropping, resizing, and adjusting the brightness and contrast. You can also use the highlighter and pen tools to add annotations to the screenshot, such as highlighting important information or adding notes. Additionally, you can use the eraser tool to remove any unwanted marks or annotations. The Snipping Tool also allows you to save your edited screenshots in various file formats, including PNG, GIF, and JPEG, making it easy to share them with others. Overall, the Snipping Tool's editing and annotating features make it a powerful tool for creating professional-looking screenshots.
Using the Game Bar to Capture Screenshots
The Game Bar is a powerful tool in Windows 10 that allows users to capture screenshots of their gaming experiences. With the Game Bar, you can easily take a screenshot of a game or app, and even share it with others. But before you can start capturing screenshots, you need to enable the Game Bar on your HP computer. In this article, we will explore how to use the Game Bar to capture screenshots, including enabling the Game Bar on your HP computer, using the Game Bar to capture a screenshot of a game or app, and accessing and sharing the captured screenshot. By the end of this article, you will be able to take high-quality screenshots of your gaming experiences and share them with others. So, let's get started by enabling the Game Bar on your HP computer.
Enabling the Game Bar on Your HP Computer
To enable the Game Bar on your HP computer, you'll need to follow a few simple steps. First, ensure that your computer is running Windows 10 or later, as the Game Bar is a feature exclusive to this operating system. Next, press the Windows key + I to open the Settings app, then click on the "Gaming" option. In the Gaming settings, toggle the switch under "Game Bar" to the "On" position. You may also want to customize the Game Bar's settings, such as setting the keyboard shortcut to open the Game Bar or configuring the types of notifications you receive. Additionally, you can also enable the Game Bar by searching for "Game Bar" in the Start menu and clicking on the "Turn on Game Bar" result. Once the Game Bar is enabled, you can use it to capture screenshots, record gameplay, and access other gaming features. By following these steps, you can easily enable the Game Bar on your HP computer and start using it to enhance your gaming experience.
Using the Game Bar to Capture a Screenshot of a Game or App
The Game Bar is a built-in feature in Windows that allows users to capture screenshots of games and apps with ease. To access the Game Bar, users can press the Windows key + G on their keyboard. This will open the Game Bar overlay, which provides various options for capturing screenshots, recording gameplay, and streaming content. To capture a screenshot of a game or app, users can click on the screenshot button, which is represented by a camera icon. The screenshot will be saved automatically to the "Captures" folder in the user's Videos folder. Users can also customize the screenshot settings by clicking on the settings icon, which allows them to choose the screenshot format, quality, and location. Additionally, users can also use the Game Bar to record gameplay, take screenshots of specific areas of the screen, and even broadcast their gameplay live to popular streaming platforms. Overall, the Game Bar provides a convenient and user-friendly way to capture screenshots of games and apps, making it a valuable tool for gamers and content creators alike.
Accessing and Sharing the Captured Screenshot
Accessing and sharing the captured screenshot is a straightforward process. Once you've captured a screenshot using the Game Bar, you can access it by opening the Xbox app on your HP device. The screenshot will be saved in the "Captures" folder, which can be found in the "Videos" section of the Xbox app. From there, you can view, edit, and share your screenshot with others. You can share your screenshot on social media platforms like Twitter, Facebook, and Instagram, or send it to your friends and family via email or messaging apps. Additionally, you can also upload your screenshot to cloud storage services like OneDrive or Google Drive, making it easily accessible from any device. If you want to edit your screenshot, you can use the built-in editing tools in the Xbox app, which allow you to crop, resize, and add text or drawings to your screenshot. Overall, accessing and sharing your captured screenshot is a simple and convenient process that can be done with just a few clicks.