How To Sear A Roast
A perfectly seared roast is the epitome of culinary excellence, with a crispy, caramelized crust giving way to a tender, juicy interior. But achieving this gastronomic nirvana requires more than just tossing a piece of meat in a hot pan. To sear a roast like a pro, you need to understand the importance of preparation, the nuances of the searing process, and the finishing touches that elevate a good roast to a great one. In this article, we'll take you through the essential steps to sear a roast that will impress even the most discerning palates. First and foremost, preparation is key. By taking the time to properly prepare your roast, you'll set yourself up for success and ensure a deliciously seared crust. So, let's start with the foundation of a perfectly seared roast: preparation.
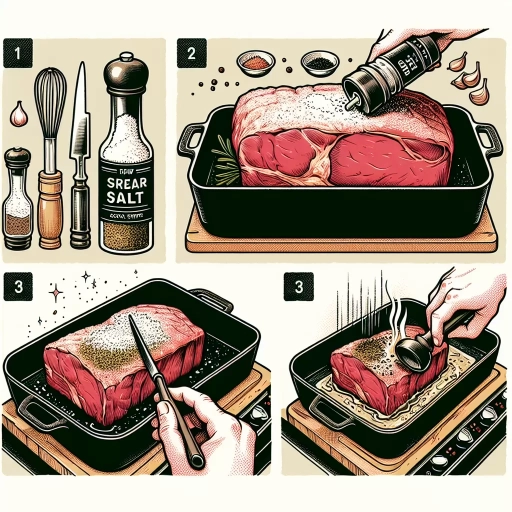
Preparation is Key
When it comes to cooking a delicious roast, preparation is key to achieving a tender, juicy, and flavorful dish. A well-prepared roast can make all the difference in the world, and it all starts with a few simple steps. First, selecting the right cut of meat is crucial, as different cuts have varying levels of marbling, tenderness, and flavor. Next, bringing the roast to room temperature before cooking ensures even cooking and prevents the outside from burning before the inside is fully cooked. Finally, seasoning the roast with a blend of herbs and spices enhances the flavor and aroma of the dish. By following these essential steps, home cooks can elevate their roast game and impress their family and friends with a mouth-watering meal. To start, let's take a closer look at the importance of choosing the right cut of meat.
Choosing the Right Cut of Meat
Choosing the right cut of meat is crucial for achieving a perfect sear on a roast. Different cuts of meat have varying levels of marbling, tenderness, and fat content, which affect the searing process. For a tender and juicy roast, opt for cuts with a good balance of marbling and tenderness, such as ribeye, strip loin, or tenderloin. These cuts have a higher fat content, which helps to keep the meat moist and flavorful during the searing process. On the other hand, leaner cuts like sirloin or round may become dry and tough if overcooked. When selecting a cut of meat, look for one with a good balance of fat and lean meat, and avoid cuts with excessive fat or connective tissue. Additionally, consider the size and shape of the roast, as a larger roast may require a longer searing time to achieve a nice crust on the outside. By choosing the right cut of meat, you'll be well on your way to achieving a perfectly seared roast.
Bringing the Roast to Room Temperature
When it comes to searing a roast, one crucial step that's often overlooked is bringing the roast to room temperature. This simple yet effective technique can make a significant difference in the quality of the sear and the overall flavor of the dish. By allowing the roast to sit at room temperature for about 30 minutes to an hour before cooking, you're giving the meat a chance to relax and redistribute its juices. This helps to ensure that the roast cooks more evenly, resulting in a more tender and flavorful final product. Additionally, a room temperature roast will sear more efficiently, as the heat from the pan can penetrate the meat more easily, creating a crispy, caramelized crust on the outside. To bring your roast to room temperature, simply remove it from the refrigerator and let it sit on the counter, uncovered, for the recommended amount of time. You can also speed up the process by placing the roast in a cold water bath or by using a thermometer to monitor its internal temperature. By taking the time to bring your roast to room temperature, you'll be rewarded with a more impressive sear and a more delicious, satisfying meal.
Seasoning the Roast for Enhanced Flavor
Seasoning the roast is a crucial step in bringing out its natural flavors and adding depth to the dish. To enhance the flavor of the roast, it's essential to use a combination of seasonings that complement its rich and savory taste. A classic seasoning blend for roast typically includes a mix of salt, pepper, garlic powder, onion powder, paprika, and dried herbs like thyme and rosemary. These seasonings work together to create a harmonious balance of flavors that elevate the roast to the next level. When seasoning the roast, it's best to use a generous amount of salt to bring out the natural flavors of the meat, while the other seasonings add a subtle yet distinct flavor profile. Additionally, allowing the roast to sit at room temperature for about 30 minutes before seasoning helps the seasonings penetrate deeper into the meat, resulting in a more evenly flavored roast. By taking the time to properly season the roast, you'll be rewarded with a dish that's full of flavor and aroma, making it a truly unforgettable culinary experience.
The Searing Process
The searing process is a crucial step in cooking that can make or break the flavor and texture of a dish. It involves quickly cooking the surface of food, usually meat or vegetables, to create a crispy crust on the outside while locking in the juices on the inside. To achieve a perfect sear, it's essential to heat the skillet to the right temperature, add oil to the skillet for a non-stick surface, and sear the roast to achieve a crispy crust. By mastering these three key elements, home cooks can elevate their cooking skills and create restaurant-quality dishes. In this article, we'll dive deeper into the searing process, starting with the importance of heating the skillet to the right temperature.
Heating the Skillet to the Right Temperature
When heating the skillet to the right temperature, there are a few key factors to consider to ensure the perfect sear. First, choose the right type of pan - a cast-iron or stainless steel skillet is ideal for searing, as they retain heat well. Next, place the pan over medium-high heat and let it preheat for 2-3 minutes, or until it reaches the desired temperature of around 400°F (200°C) to 450°F (230°C). To check the temperature, use an infrared thermometer or flick a few drops of water onto the pan - if they sizzle and evaporate quickly, the pan is ready. It's also important to not add oil to the pan before it reaches the correct temperature, as this can prevent the pan from reaching its full heat potential. Once the pan is hot, add a small amount of oil, such as canola or avocado oil, to the pan and let it heat for another minute before adding the roast. This will ensure a crispy crust forms on the outside of the roast while locking in juices and flavors. By taking the time to heat the skillet to the right temperature, you'll be rewarded with a perfectly seared roast that's full of flavor and texture.
Adding Oil to the Skillet for a Perfect Sear
Adding oil to the skillet is a crucial step in achieving a perfect sear on your roast. The type of oil used can greatly impact the flavor and texture of the crust that forms on the meat. Choose an oil with a high smoke point, such as avocado oil or grapeseed oil, to ensure that it can handle the high heat required for searing. The amount of oil to add is also important, as too little oil can cause the meat to stick to the pan, while too much oil can prevent the formation of a nice crust. A good rule of thumb is to add about 1-2 tablespoons of oil to the skillet, depending on its size. Once the oil is added, let it heat up for about 1-2 minutes, or until it starts to shimmer and slightly smoke. This will help to create a non-stick surface and ensure that the meat sears evenly. Finally, be sure to tilt the skillet to make sure the oil covers the entire surface, this will help to prevent hotspots and ensure that the meat sears consistently. By following these simple steps, you'll be well on your way to achieving a perfect sear on your roast.
Searing the Roast to Achieve a Crispy Crust
Searing the roast to achieve a crispy crust is a crucial step in the cooking process that requires attention to detail and a bit of finesse. To start, preheat the oven to a high temperature, typically between 425°F to 450°F (220°C to 230°C), and place the roast in a hot skillet or oven-safe pan over high heat. Add a small amount of oil to the pan, just enough to coat the bottom, and swirl it around to ensure even coverage. Next, carefully place the roast in the pan, making sure not to splash any oil or disturb the seasoning. Sear the roast for 2-3 minutes on each side, or until a nice brown crust forms. This initial sear is essential in creating a flavorful and aromatic crust that will enhance the overall taste of the roast. Once the roast is seared, transfer it to the preheated oven and continue cooking to the desired level of doneness. It's essential to note that the type of roast and its size will affect the searing time, so it's crucial to monitor the roast closely to avoid overcooking. A crispy crust can make all the difference in the world, adding texture and flavor to the dish, so don't be afraid to experiment with different seasoning and oil combinations to find the perfect sear. By following these simple steps and paying attention to the details, you'll be able to achieve a perfectly seared roast with a crispy crust that will impress even the most discerning palates.
Finishing Touches
When it comes to cooking a roast, the finishing touches can make all the difference between a mediocre meal and a truly exceptional one. To take your roast to the next level, there are three key steps to focus on: finishing the roast in the oven for even cooking, letting it rest for maximum tenderness, and slicing and serving it to perfection. By incorporating these techniques into your cooking routine, you'll be able to achieve a deliciously cooked roast that's sure to impress. To start, let's dive into the importance of finishing the roast in the oven for even cooking. This step is crucial in ensuring that your roast is cooked consistently throughout, and it's a game-changer for achieving that perfect, fall-apart texture. By transferring your roast to the oven, you'll be able to cook it evenly and prevent hot spots that can lead to overcooking. So, let's explore the benefits of finishing the roast in the oven and how it can elevate your cooking to new heights.
Finishing the Roast in the Oven for Even Cooking
Finishing the Roast in the Oven for Even Cooking Finishing the roast in the oven is a crucial step in achieving even cooking. After searing the roast to perfection, it's essential to transfer it to the oven to complete the cooking process. This method ensures that the roast cooks uniformly throughout, preventing overcooking or undercooking. To finish the roast in the oven, preheat it to the recommended temperature, usually between 300°F to 325°F (150°C to 165°C). Place the roast in a roasting pan, leaving enough space around it for air to circulate. You can add some aromatics like onions, carrots, and celery to the pan for added flavor. Cover the pan with aluminum foil to prevent over-browning and promote even cooking. Roast the meat in the preheated oven for the recommended time, usually 15 to 20 minutes per pound, or until it reaches the desired level of doneness. Use a meat thermometer to check the internal temperature, ensuring it reaches a safe minimum internal temperature. Once the roast is cooked to your liking, remove it from the oven and let it rest for 10 to 15 minutes before slicing and serving. This resting period allows the juices to redistribute, making the roast even more tender and flavorful. By finishing the roast in the oven, you'll achieve a perfectly cooked, evenly browned, and deliciously tender roast that's sure to impress your family and friends.
Letting the Roast Rest for Maximum Tenderness
Letting the roast rest for maximum tenderness is a crucial step in the cooking process that is often overlooked. When a roast is cooked, the heat causes the proteins in the meat to contract and tighten, making it tough and dense. By letting the roast rest, you allow the proteins to relax and redistribute, making the meat more tender and juicy. This process, known as "relaxation," allows the juices to redistribute throughout the meat, making it more flavorful and tender. The resting time will vary depending on the size and type of roast, but a general rule of thumb is to let it rest for 10-20 minutes before slicing. During this time, the roast will retain its heat, and the juices will continue to redistribute, making it even more tender and flavorful. By letting the roast rest, you will be rewarded with a more tender and juicy final product that is sure to impress your guests. Additionally, letting the roast rest also makes it easier to slice, as the meat will be more relaxed and less likely to tear or shred. Overall, letting the roast rest is a simple yet effective way to achieve maximum tenderness and flavor in your roast.
Slicing and Serving the Perfectly Seared Roast
Slicing and serving the perfectly seared roast is an art that requires attention to detail and a bit of finesse. To start, let the roast rest for 10-15 minutes before slicing, allowing the juices to redistribute and the meat to relax. This crucial step ensures that the roast remains tender and juicy, rather than dry and overcooked. Next, use a sharp knife to slice the roast against the grain, taking care to slice in a smooth, even motion. This will help to prevent the meat from tearing and create a more visually appealing presentation. When serving, consider adding a few finishing touches, such as a drizzle of pan juices or a sprinkle of fresh herbs, to elevate the dish and add a pop of color. Finally, be mindful of portion sizes and slice the roast accordingly, taking care to provide each guest with a generous and satisfying serving. By following these simple steps, you'll be able to slice and serve a perfectly seared roast that's sure to impress even the most discerning diners. Whether you're serving a special occasion meal or a simple weeknight dinner, a beautifully sliced and presented roast is sure to be a hit.