How Do You Take A Screenshot On An Iphone
Taking a screenshot on an iPhone is a simple yet powerful feature that allows you to capture and preserve moments from your screen. Whether you want to save a funny meme, document a problem, or share a great find with friends, knowing how to take a screenshot on your iPhone is essential. In this article, we will explore the basics of taking a screenshot on an iPhone, including the different methods you can use to capture your screen. We will also delve into the various editing options available to enhance your screenshot, as well as the ways you can share it with others. By the end of this article, you will be equipped with the knowledge to take, edit, and share screenshots like a pro. So, let's start with the fundamentals - Understanding the Basics of Taking a Screenshot on an iPhone.
Understanding the Basics of Taking a Screenshot on an iPhone
Taking a screenshot on an iPhone is a fundamental skill that every user should master. Whether you want to capture a memorable moment, share a funny conversation, or document a technical issue, knowing how to take a screenshot is essential. To get started, it's crucial to understand the basics of taking a screenshot on an iPhone. This involves locating the Sleep/Wake button and Home button, understanding the role of the Volume Down button, and familiarizing yourself with the Screenshot Preview. By grasping these fundamental concepts, you'll be able to take high-quality screenshots with ease. In this article, we'll delve into the specifics of each of these components, starting with the first step: locating the Sleep/Wake button and Home button.
Locating the Sleep/Wake Button and Home Button
To locate the Sleep/Wake button and Home button on your iPhone, you need to know where to look. The Sleep/Wake button is located on the top right side of your iPhone, while the Home button is situated at the bottom center of the screen. The Sleep/Wake button is used to turn your iPhone on and off, as well as to put it to sleep or wake it up. The Home button, on the other hand, is used to return to the home screen, access the app switcher, and activate Siri. To take a screenshot, you will need to use a combination of these two buttons. Make sure you know where they are located before attempting to take a screenshot.
Understanding the Role of the Volume Down Button
The volume down button plays a crucial role in taking a screenshot on an iPhone. Located on the left side of the device, this button is often overlooked, but it's essential for capturing the screen. When you press the volume down button simultaneously with the side button, the iPhone captures the current screen and saves it to the Screenshots album in the Photos app. The volume down button is used in conjunction with the side button to avoid accidental screenshots, which can occur when using the sleep/wake button. By using the volume down button, you can take a screenshot quickly and easily, without having to worry about putting your iPhone to sleep or waking it up. Additionally, the volume down button is also used to adjust the volume of your iPhone, making it a versatile button that serves multiple purposes. Understanding the role of the volume down button is essential for taking screenshots on an iPhone, and it's a simple yet effective way to capture and share your screen with others.
Familiarizing Yourself with the Screenshot Preview
When you take a screenshot on your iPhone, a preview of the screenshot will appear in the bottom-left corner of the screen. This preview is a small thumbnail image of the screenshot you just took, and it provides a quick way to review and edit the screenshot before saving it to your Photos app. To familiarize yourself with the screenshot preview, start by taking a screenshot of any screen on your iPhone. As soon as you hear the camera shutter sound and see the screen flash, look for the preview in the bottom-left corner. You'll see a small image of the screenshot, along with a few options to edit or share it. You can tap on the preview to open it in the Markup editor, where you can add text, draw on the screenshot, or crop it to your liking. You can also swipe left on the preview to dismiss it and save the screenshot to your Photos app, or swipe right to share it with others via email, message, or social media. By getting to know the screenshot preview, you'll be able to quickly and easily edit and share your screenshots, making it a powerful tool in your iPhone photography arsenal.
Methods for Taking a Screenshot on an iPhone
Taking a screenshot on an iPhone is a simple yet powerful feature that allows users to capture and share moments from their screen. There are several methods to take a screenshot on an iPhone, each with its own unique steps and benefits. In this article, we will explore three common methods for taking a screenshot on an iPhone: using the Sleep/Wake and Home Buttons combination, using the Sleep/Wake and Volume Down Buttons combination, and using AssistiveTouch. By understanding these different methods, users can choose the one that best suits their needs and preferences. Whether you want to capture a funny meme, a important message, or a beautiful wallpaper, taking a screenshot on an iPhone is a quick and easy way to preserve the moment. In the next section, we will dive into the first method: Using the Sleep/Wake and Home Buttons combination.
Using the Sleep/Wake and Home Buttons Combination
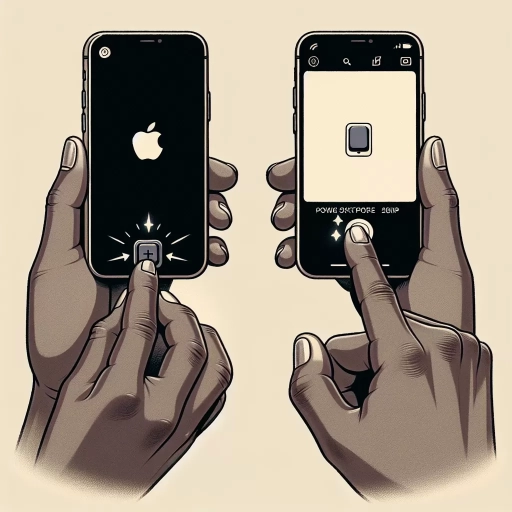
To take a screenshot on an iPhone, you can use the Sleep/Wake and Home buttons combination. This method is applicable to iPhone models with a Home button, such as iPhone 6, 6 Plus, 6s, 6s Plus, SE (1st generation), 7, 7 Plus, 8, and 8 Plus. To use this method, locate the Sleep/Wake button on the top right side of your iPhone and the Home button at the bottom center of the screen. Press and hold the Sleep/Wake button and the Home button simultaneously for at least 1 second. You will hear a camera shutter sound and see a flash on the screen, indicating that a screenshot has been taken. The screenshot will be saved to your Screenshots album in the Photos app, where you can view, edit, and share it as needed. This method is quick and easy to use, and it works well for capturing screenshots of your iPhone's screen.
Using the Sleep/Wake and Volume Down Buttons Combination
Using the Sleep/Wake and Volume Down Buttons Combination is a simple and effective method for taking a screenshot on an iPhone. To do this, locate the Sleep/Wake button on the top right side of your iPhone and the Volume Down button on the left side. Press and hold the Sleep/Wake button and immediately press the Volume Down button. You will hear a camera shutter sound and see a flash on the screen, indicating that a screenshot has been taken. The screenshot will be saved to your Screenshots album in the Photos app, where you can view, edit, and share it as needed. This method is available on iPhone models without a Home button, such as the iPhone X and later. It's a convenient way to capture a screenshot, especially when you need to take a quick snapshot of something on your screen. Additionally, you can also use this method to take a screenshot of a specific part of the screen by selecting the area you want to capture before taking the screenshot. Overall, using the Sleep/Wake and Volume Down Buttons Combination is a straightforward and efficient way to take a screenshot on your iPhone.
Using AssistiveTouch to Take a Screenshot
Using AssistiveTouch to take a screenshot is a convenient alternative to the traditional method of pressing the Sleep/Wake and Home buttons simultaneously. To access this feature, go to Settings, then General, and select Accessibility. From there, tap on AssistiveTouch and toggle the switch to the right to enable it. A small white circle will appear on your screen, which you can move to any location by dragging it. To take a screenshot, tap on the AssistiveTouch circle, then select Device, and finally tap on More. From the list of options, choose Screenshot, and your iPhone will capture the current screen. The screenshot will be saved to your Screenshots album in the Photos app, where you can view, edit, and share it as desired. This method is particularly useful for those who have difficulty pressing multiple buttons at once or prefer a more accessible way to take screenshots.
Editing and Sharing Your iPhone Screenshot
When you take a screenshot on your iPhone, you're not limited to simply saving it to your Photos app. With the built-in editing and sharing features, you can enhance, annotate, and share your screenshot with others in just a few taps. In this article, we'll explore the various ways you can edit and share your iPhone screenshot, including accessing the screenshot preview and editing options, sharing your screenshot via messages, email, or social media, and using markup to annotate and highlight important information. By the end of this article, you'll be able to take your screenshot game to the next level and make the most out of this powerful feature. So, let's get started by accessing the screenshot preview and editing options, which is the first step in editing and sharing your iPhone screenshot.
Accessing the Screenshot Preview and Editing Options
When you take a screenshot on your iPhone, you'll see a thumbnail preview of the screenshot in the bottom-left corner of the screen. This preview gives you a quick glance at the screenshot you just took, and it also provides access to editing options. To access the screenshot preview and editing options, simply tap on the thumbnail. This will open the Markup editor, where you can edit and annotate your screenshot. In the Markup editor, you'll find a variety of tools and features that allow you to customize your screenshot, including a pen, pencil, and highlighter for drawing and writing, as well as a text tool for adding text. You can also use the Markup editor to crop, rotate, and resize your screenshot. Additionally, you can use the "Share" button to share your edited screenshot with others via email, message, or social media. If you don't want to edit your screenshot, you can simply swipe left on the thumbnail to dismiss it and save the screenshot to your Photos app.
Sharing Your Screenshot via Messages, Email, or Social Media
When you've captured the perfect screenshot on your iPhone, you'll likely want to share it with others. Fortunately, Apple makes it easy to share your screenshot via Messages, email, or social media. To share your screenshot, start by opening the Screenshots album in your Photos app. From there, select the screenshot you want to share and tap the "Share" icon, which looks like a box with an arrow coming out of it. This will open the Share menu, where you can choose how you want to share your screenshot. If you want to share it with a friend or family member, you can select the "Messages" option and enter their name or phone number. If you want to share it with a larger audience, you can select the "Mail" option and compose an email with your screenshot attached. Alternatively, you can share your screenshot on social media by selecting the "Facebook," "Twitter," or "Instagram" option. You can also use the "More" option to share your screenshot on other social media platforms or via other apps. Once you've selected your sharing method, you can add a caption or message to your screenshot before sending it off. With just a few taps, you can share your screenshot with anyone, anywhere.
Using Markup to Annotate and Highlight Important Information
When it comes to editing and sharing your iPhone screenshot, using markup to annotate and highlight important information is a game-changer. With the Markup tool, you can add text, draw shapes, and even add a signature to your screenshot, making it easier to convey your message or point out specific details. To access the Markup tool, simply take a screenshot and then tap the thumbnail that appears in the bottom-left corner of the screen. From there, you can choose from a variety of tools, including a pen, pencil, and highlighter, to add your annotations. You can also use the text tool to add captions or notes to your screenshot, and even change the font, size, and color to suit your needs. Additionally, the Markup tool allows you to crop and resize your screenshot, making it easy to focus on the most important information. Whether you're sharing a screenshot with a colleague, friend, or family member, using markup to annotate and highlight important information can help ensure that your message is clear and concise. By taking a few extra seconds to add some context to your screenshot, you can avoid confusion and make it easier for others to understand what you're trying to communicate. So next time you take a screenshot on your iPhone, be sure to explore the Markup tool and see how it can help you take your screenshot game to the next level.