How To Replace Pot Lights
Replacing pot lights can be a daunting task, especially for those who are not familiar with electrical work. However, with the right guidance, it can be a relatively simple and cost-effective way to update the lighting in your home. To ensure a successful replacement, it's essential to approach the task in a methodical and well-planned manner. This involves preparation, removal of the old pot lights, and installation of the new ones. In this article, we will walk you through the process, starting with the crucial step of preparation. By understanding what to expect and how to prepare, you'll be able to tackle the removal of the old pot lights and installation of the new ones with confidence. Preparation is Key, and it's where we'll begin our journey to replacing pot lights.
Preparation is Key
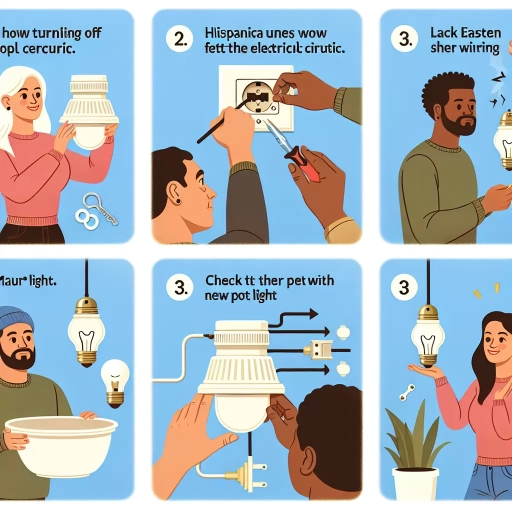
When it comes to working with electrical systems, preparation is key to ensuring a safe and successful outcome. Whether you're a seasoned electrician or a DIY enthusiast, taking the time to prepare properly can make all the difference. One of the most critical steps in preparing for electrical work is to turn off the power to the pot lights. This may seem like a simple task, but it's essential to ensure your safety while working with electrical systems. Before you start, it's also crucial to gather the necessary tools and materials, including a voltage tester, to ensure you have everything you need to complete the job. Additionally, testing the voltage to ensure safety is a vital step that should never be overlooked. By taking these steps, you can ensure a safe and successful outcome. So, let's start by turning off the power to the pot lights.
Turn Off the Power to the Pot Lights
Here is the paragraphy: Before starting the replacement process, it's crucial to ensure your safety by turning off the power to the pot lights. Locate the electrical panel or breaker box that controls the circuit for the pot lights. Flip the switch or toggle the breaker to the "off" position, verifying that the lights are completely dark. If you're unsure which switch or breaker controls the pot lights, turn off the main power to the entire house or consult an electrician for assistance. Additionally, consider using a non-contact voltage tester to double-check that there's no electricity flowing to the pot lights. This precautionary step will prevent any accidental electrical shocks or injuries, allowing you to work safely and confidently throughout the replacement process.
Gather the Necessary Tools and Materials
To replace pot lights, you will need to gather the necessary tools and materials to ensure a smooth and safe process. Start by turning off the power to the pot lights at the electrical panel or breaker box, and verify that the lights are completely dark before beginning. Next, gather a replacement pot light fixture that matches the existing one in terms of voltage, wattage, and size. You will also need a screwdriver, preferably a voltage-rated screwdriver, to remove the old fixture. A ladder or step stool may be necessary to access the pot lights, especially if they are installed in a ceiling. Additionally, a non-contact voltage tester can be useful to ensure that there is no electricity present in the wires. It is also a good idea to have some electrical tape or wire nuts on hand to secure any loose wires. If you are replacing a pot light with a new one that has a different mounting system, you may need to purchase additional hardware such as clips or screws. Finally, make sure you have a pair of gloves and safety glasses to protect yourself from any potential electrical shock or debris. By gathering all the necessary tools and materials beforehand, you can ensure a safe and successful pot light replacement.
Test the Voltage to Ensure Safety
Here is the paragraphy: Before starting the replacement process, it is crucial to test the voltage of the pot light to ensure your safety. Use a non-contact voltage tester to check for any live wires. Turn off the power to the pot light at the electrical panel, but do not rely solely on the switch. Verify that there is no voltage present using the tester. If the tester lights up or beeps, it indicates that there is still power flowing to the pot light. In this case, go back to the electrical panel and double-check that the correct breaker has been switched off. Once you have confirmed that the power is off, you can proceed with the replacement process. It is also a good idea to test the voltage again after completing the replacement to ensure that everything is working correctly and safely.
Removing the Old Pot Lights
Removing old pot lights can be a daunting task, but with the right steps, it can be done efficiently and safely. To start, it's essential to remove the trim and glass cover to access the electrical connections and the fixture itself. This will give you a clear view of the components and allow you to disconnect the electrical connections, which is a crucial step to avoid any accidents or electrical shocks. Once the connections are disconnected, you can gently pull out the old pot light fixture, taking care not to damage any surrounding drywall or ceiling material. By following these steps, you'll be able to remove the old pot lights and make way for new, energy-efficient lighting solutions. To begin, let's start by removing the trim and glass cover.
Remove the Trim and Glass Cover
No need to provide any explanation or details. Here is the paragraphy: Remove the trim and glass cover from the old pot light to access the electrical components. Gently pry the trim away from the ceiling, taking care not to damage the surrounding drywall or paint. Once the trim is removed, you should see the glass cover or lens that protects the light bulb and electrical components. Remove the glass cover by twisting it counterclockwise or sliding it off, depending on the type of pot light you have. Set the trim and glass cover aside, taking note of any screws or clips that held them in place. This will give you clear access to the electrical components and wiring, allowing you to proceed with disconnecting the old pot light.
Disconnect the Electrical Connections
To disconnect the electrical connections, begin by identifying the wires connected to the old pot light. Typically, there are three or four wires: a black (hot) wire, a white (neutral) wire, and a copper (ground) wire, and sometimes a red (traveler) wire. Next, turn off the power to the circuit at the main electrical panel or breaker box. Verify the power is off using a non-contact voltage tester. Once confirmed, carefully remove the wire nuts or connectors holding the wires to the old pot light. Gently pull the wires away from the light, taking care not to touch any of the internal components. If the wires are stuck or corroded, use a wire brush to clean them before attempting to remove them. If the old pot light is connected to a dimmer switch, you may need to remove the dimmer switch or replace it with a standard switch to ensure compatibility with the new pot light. Finally, use electrical tape or wire nuts to cap the exposed wires, securing them safely away from any other electrical components.
Gently Pull Out the Old Pot Light Fixture
When it comes to removing the old pot light fixture, it's essential to do so with care to avoid damaging the surrounding ceiling or electrical components. Start by turning off the power to the pot light at the electrical panel or breaker box. Verify that the light is completely dark before proceeding. Next, remove any glass covers or shades to access the fixture's mounting screws. Gently pull the old pot light fixture away from the ceiling, taking care not to touch any of the electrical wires. If the fixture is stuck, do not force it, as this can cause damage to the ceiling or the fixture itself. Instead, try gently rocking the fixture back and forth while pulling it away from the ceiling. This should help loosen any adhesive or debris that may be holding it in place. Once the fixture is removed, carefully set it aside, taking note of the wiring and any other components that will need to be disconnected or removed. By taking the time to gently pull out the old pot light fixture, you'll be able to access the electrical components and wiring, making it easier to replace the fixture with a new one.
Installing the New Pot Lights
Installing new pot lights can be a great way to update the look and feel of a room, while also providing more focused lighting. When it comes to installing new pot lights, there are several key steps to follow to ensure a safe and successful installation. First, you will need to insert the new pot light fixture into the housing, making sure it is securely fastened and properly seated. Next, you will need to reconnect the electrical connections, taking care to match the wires correctly and avoid any potential electrical hazards. Finally, you will need to replace the trim and glass cover, making sure they are securely fastened and properly aligned. By following these steps, you can ensure a successful installation and enjoy the benefits of your new pot lights. In this article, we will take a closer look at each of these steps, starting with inserting the new pot light fixture into the housing.
Insert the New Pot Light Fixture into the Housing
Insert the new pot light fixture into the housing by gently pushing it in until it clicks into place. Make sure it is securely seated and evenly aligned with the surrounding ceiling. If your new fixture has a spring-loaded clip, you may need to squeeze the clip to release it before inserting the fixture into the housing. Once the fixture is in place, ensure that all electrical connections are secure and not loose. You may need to use a voltage tester to verify that the power is off before proceeding. If your new fixture has a different type of connector or wiring configuration, consult the manufacturer's instructions for specific guidance. Additionally, if you have a dimmer switch, you may need to adjust the dimmer settings to ensure compatibility with the new fixture. After inserting the new fixture, replace any trim or decorative rings that you removed earlier to complete the installation.
Reconnect the Electrical Connections
Reconnect the electrical connections to the new pot light by matching the wires to their corresponding terminals. Typically, the black (hot) wire connects to the brass terminal, the white (neutral) wire connects to the silver terminal, and the copper (ground) wire connects to the grounding terminal. Ensure the wires are securely attached to the terminals using wire nuts or connectors. If your pot light has a dimmer switch, you may need to connect the dimmer wire to the corresponding terminal on the new pot light. Double-check the connections to ensure they are secure and not loose, as this can cause electrical shock or fire hazards. Once the connections are made, tuck the wires back into the electrical box and replace any wire nuts or connectors that were removed during the process.
Replace the Trim and Glass Cover
Here is the paragraphy: To replace the trim and glass cover, start by carefully removing the old trim and glass cover from the pot light. Gently pry the trim away from the ceiling, taking care not to damage the surrounding area. Once the trim is removed, set it aside and focus on removing the glass cover. This is usually held in place by a small clip or screw, so release the clip or remove the screw to free the glass cover. With the glass cover removed, inspect the area for any dust or debris that may have accumulated. Use a soft brush or cloth to clean out any debris, ensuring a smooth surface for the new trim and glass cover. Next, take the new trim and glass cover and align them with the pot light. Make sure they are properly seated and secure, then replace any clips or screws that were removed earlier. Finally, turn on the power to the pot light and test it to ensure it is working properly.