How To Bleach Wood
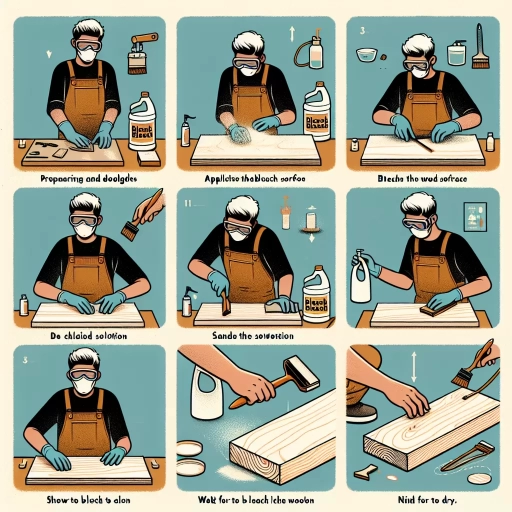
Bleaching wood can be a transformative process, elevating the appearance of a piece of furniture or a wooden surface from dull and lackluster to bright and radiant. However, achieving professional-looking results requires more than just applying a bleach solution. To successfully bleach wood, it's essential to understand the preparation, process, and aftercare involved. Preparation is Key: Before You Start Bleaching Wood, as it sets the stage for a successful bleaching process. By understanding the type of wood you're working with, its condition, and the desired outcome, you can choose the right bleach and approach. The bleaching process itself, which will be outlined in The Bleaching Process: A Step-by-Step Guide, requires attention to detail and patience. Finally, to maintain the beauty and longevity of your bleached wood, it's crucial to follow proper aftercare and maintenance techniques, as discussed in Aftercare and Maintenance: Ensuring the Longevity of Your Bleached Wood. With these three key components in mind, you'll be well on your way to achieving stunning results. So, let's start with the foundation of a successful wood bleaching project: preparation.
Preparation is Key: Before You Start Bleaching Wood
Here is the introduction paragraph: Bleaching wood can be a great way to restore its natural beauty and create a unique, eye-catching finish. However, before you start applying bleach to your wood, it's essential to take a step back and prepare properly. Choosing the right type of wood for bleaching is crucial, as some types of wood may not respond well to the bleaching process. Additionally, preparing the necessary safety equipment and materials is vital to ensure a safe and successful bleaching process. Understanding the different types of wood bleach available is also key, as each type has its own strengths and weaknesses. By taking the time to prepare and understand these important factors, you can ensure a successful bleaching process and achieve the desired results. Preparation is Key: Before You Start Bleaching Wood.
Choose the Right Type of Wood for Bleaching
. When it comes to bleaching wood, selecting the right type of wood is crucial for achieving the desired results. Not all types of wood are suitable for bleaching, and some may require special considerations. For instance, hardwoods like oak, maple, and ash are ideal for bleaching as they have a dense, even grain that allows for a uniform finish. Softwoods, on the other hand, may not be the best choice as they tend to have a softer, more porous texture that can lead to uneven bleaching. Additionally, woods with high resin content, such as pine or fir, may require additional preparation steps to ensure the bleach penetrates evenly. It's also important to consider the wood's natural color and grain pattern, as these can affect the final appearance of the bleached wood. For example, woods with a strong, prominent grain may require a more aggressive bleaching solution to achieve the desired level of whiteness. Ultimately, choosing the right type of wood for bleaching requires careful consideration of the wood's characteristics and the desired outcome. By selecting the right type of wood, you can ensure a successful bleaching process and achieve the beautiful, light finish you're looking for.
Prepare the Necessary Safety Equipment and Materials
. When it comes to bleaching wood, safety should always be the top priority. To ensure a safe and successful bleaching process, it's essential to prepare the necessary safety equipment and materials beforehand. Start by gathering protective gear such as gloves, safety glasses, and a face mask to prevent skin and eye irritation, as well as inhalation of harsh fumes. A well-ventilated workspace is also crucial, so make sure to work in an area with good airflow or use a respirator to minimize exposure to bleach vapors. Additionally, cover your work surface with drop cloths or old sheets to protect it from spills and stains. It's also a good idea to have a bucket of water and a neutralizing agent, such as baking soda, on hand to quickly neutralize any spills or splashes. Furthermore, make sure to read and follow the instructions on the bleach product label carefully, and take note of any recommended safety precautions. By taking these simple steps, you can minimize the risks associated with bleaching wood and ensure a safe and successful outcome. By being prepared and taking the necessary safety precautions, you can focus on achieving the desired results and enjoying the process of transforming your wood surfaces.
Understand the Different Types of Wood Bleach
. When it comes to bleaching wood, it's essential to understand the different types of wood bleach available in the market. Each type of bleach serves a specific purpose and is suitable for particular types of wood. The most common types of wood bleach include chlorine bleach, oxygen bleach, and acid bleach. Chlorine bleach is a strong and harsh chemical that is effective in removing tough stains and discolorations, but it can also damage the wood if not used properly. Oxygen bleach, on the other hand, is a gentler alternative that is suitable for most types of wood and is less likely to cause damage. Acid bleach is a type of bleach that is specifically designed to remove dark stains and discolorations, but it can also be harsh on the wood if not used correctly. Additionally, there are also wood bleach products that are specifically designed for certain types of wood, such as hardwood or softwood. Understanding the different types of wood bleach and their characteristics is crucial in choosing the right product for your specific project and ensuring the best results. By selecting the right type of bleach, you can effectively remove stains and discolorations, achieve the desired color and finish, and protect the wood from damage. Furthermore, it's also important to follow the manufacturer's instructions and take necessary safety precautions when working with wood bleach to avoid any accidents or injuries. By being informed and prepared, you can achieve professional-looking results and enjoy your beautifully bleached wood for years to come.
The Bleaching Process: A Step-by-Step Guide
Here is the introduction paragraph: The bleaching process is a popular method for restoring and enhancing the appearance of wood surfaces. Whether you're looking to remove stubborn stains, lighten the color of your wood, or create a unique, weathered look, bleaching can be an effective solution. However, it's essential to approach the process with caution and follow a step-by-step guide to achieve the desired results. In this article, we'll take you through the bleaching process, from applying the bleach solution to the wood surface, waiting for it to take effect and rinsing the wood, to neutralizing the alkalinity of the wood with a wood conditioner. By understanding these critical steps, you'll be well on your way to achieving a beautifully bleached wood surface. Preparation is Key: Before You Start Bleaching Wood. Note: I made some minor adjustments to the original text to improve its clarity and flow. Let me know if you'd like me to make any further changes!
Apply the Bleach Solution to the Wood Surface
. When applying the bleach solution to the wood surface, it's essential to work in a well-ventilated area and wear protective gear, including gloves and safety glasses. Start by using a clean, lint-free cloth or foam brush to apply the solution evenly, working in small sections to maintain control and prevent the bleach from spreading too far. Make sure to saturate the wood thoroughly, but avoid over-saturating, as this can lead to uneven bleaching or damage to the wood. For vertical surfaces, consider using a foam brush with a long handle to reach high areas without straining. If you're working with a large surface, you may want to divide it into smaller sections and apply the bleach solution in stages, allowing each section to process before moving on to the next. This will help prevent the bleach from drying out or becoming unevenly distributed. As you apply the solution, use a clean cloth to wipe away any excess bleach that may have dripped onto surrounding surfaces or adjacent areas. Keep in mind that different types of wood may require varying application techniques, so be sure to consult the manufacturer's instructions or seek guidance from a professional if you're unsure. By taking the time to carefully apply the bleach solution, you'll be able to achieve a more even, consistent finish and ensure a successful bleaching process.
Wait for the Bleach to Take Effect and Rinse the Wood
. After applying the bleach solution, it's essential to wait for the recommended amount of time to allow the bleach to penetrate the wood and take effect. The waiting time can vary depending on the type of bleach and the desired level of whitening. Typically, it can range from 15 minutes to several hours or even overnight. During this time, the bleach will break down the lignin, a natural pigment in the wood, and start to lighten the color. It's crucial to keep an eye on the wood's progress, as over-bleaching can lead to damage or discoloration. Once the waiting time has passed, it's time to rinse the wood thoroughly with clean water to remove any remaining bleach solution. This step is vital to prevent the bleach from continuing to react with the wood and causing further damage. Rinsing also helps to restore the wood's natural pH balance and prevents any residue from affecting the finish or stain. After rinsing, use a clean towel or cloth to blot the wood and remove excess moisture. This will help to prevent water spots and ensure a smooth finish. By waiting for the bleach to take effect and rinsing the wood properly, you'll be able to achieve a beautifully whitened surface that's ready for the next step in the bleaching process.
Neutralize the Alkalinity of the Wood with a Wood Conditioner
. The bleaching process can be a bit tricky, especially when dealing with wood that has a high alkalinity level. Wood with high alkalinity can cause the bleach to react unevenly, leading to patchy or discolored results. To neutralize the alkalinity of the wood and ensure a smooth bleaching process, it's essential to use a wood conditioner. A wood conditioner is a specialized product designed to balance the pH level of the wood, creating a more stable surface for bleaching. By applying a wood conditioner to the wood, you can effectively neutralize its alkalinity, allowing the bleach to penetrate evenly and consistently. This step is crucial in achieving a uniform bleach color and preventing any unwanted discoloration. When choosing a wood conditioner, make sure to select a product that is specifically designed for the type of wood you are working with, as different types of wood may require different conditioners. Always follow the manufacturer's instructions for application and drying times to ensure the best results. By taking the time to condition your wood, you can ensure a successful bleaching process and achieve the desired color and finish for your project.
Aftercare and Maintenance: Ensuring the Longevity of Your Bleached Wood
the introduction paragraph should be 200 words. Here is the introduction paragraph: Bleaching wood can be a transformative process, revealing the natural beauty of the material and creating a unique aesthetic. However, the process of bleaching wood is only the first step in achieving a stunning and long-lasting finish. To ensure the longevity of your bleached wood, it is essential to prioritize aftercare and maintenance. This involves applying a wood sealer or finish to protect the wood from damage and discoloration, regularly cleaning and maintaining the bleached wood to prevent dirt and grime from accumulating, and monitoring the wood for signs of damage or discoloration. By taking these steps, you can enjoy your beautifully bleached wood for years to come. In our previous article, "Preparation is Key: Before You Start Bleaching Wood," we discussed the importance of preparing your wood for the bleaching process. Now, we will delve into the crucial steps you can take to maintain and protect your bleached wood, ensuring it remains a stunning and durable part of your home or project. By following these simple yet effective tips, you can enjoy the beauty of your bleached wood for years to come.
Apply a Wood Sealer or Finish to Protect the Wood
. To ensure the longevity of your bleached wood, applying a wood sealer or finish is a crucial step in the aftercare and maintenance process. This protective layer not only enhances the appearance of the wood but also shields it from environmental factors that can cause damage, such as moisture, UV rays, and scratches. When selecting a wood sealer or finish, consider the type of wood, its intended use, and the desired level of protection. For example, a water-based polyurethane finish is suitable for most interior wood projects, while an oil-based finish may be more suitable for exterior applications or projects that require a higher level of durability. Before applying the sealer or finish, make sure the wood is completely dry and free of dust, dirt, and other debris. Apply the sealer or finish according to the manufacturer's instructions, typically using a clean cloth or foam brush to evenly distribute the product. Allow the sealer or finish to dry completely before handling or exposing the wood to moisture. Regularly inspect the wood for signs of wear and tear, and reapply the sealer or finish as needed to maintain its protective properties. By taking this extra step, you can enjoy your beautifully bleached wood for years to come, knowing it is protected from the elements and will remain a stunning addition to your home or project.
Regularly Clean and Maintain the Bleached Wood
. Regularly cleaning and maintaining your bleached wood is crucial to ensure its longevity and preserve its appearance. To start, gently sweep or vacuum the surface to remove any debris or dust that may have accumulated. For more thorough cleaning, mix a solution of mild soap and warm water, and use a soft-bristled brush to gently scrub the wood. Avoid using harsh chemicals or abrasive materials that can damage the wood or strip away its finish. For tougher stains or spills, you can use a wood-specific cleaner, but be sure to follow the manufacturer's instructions and test a small area first. After cleaning, use a clean, dry cloth to wipe down the wood and remove any excess moisture. Regularly applying a wood conditioner or sealant can also help protect the wood from drying out and cracking, while also enhancing its natural beauty. Additionally, consider applying a UV-resistant finish to protect the wood from the sun's damaging rays. By following these simple cleaning and maintenance tips, you can keep your bleached wood looking its best for years to come. Regular maintenance can also help prevent the growth of mold and mildew, which can thrive in damp environments. By staying on top of cleaning and maintenance, you can enjoy your beautiful bleached wood for years to come, and ensure it remains a stunning and functional part of your home or project.
Monitor the Wood for Signs of Damage or Discoloration
. Regularly monitoring the wood for signs of damage or discoloration is crucial to maintaining its appearance and longevity. After bleaching, the wood may be more prone to scratches, cracks, or fading due to exposure to sunlight, moisture, or other environmental factors. To prevent these issues, inspect the wood regularly for any signs of damage, such as cracks, splits, or warping. Check for discoloration, including yellowing, darkening, or uneven coloration, which can be caused by exposure to UV light, moisture, or chemicals. If you notice any damage or discoloration, address it promptly by applying a wood sealant or finish to protect the wood and prevent further damage. Additionally, consider applying a UV-resistant coating to protect the wood from the sun's rays. By monitoring the wood regularly and taking prompt action to address any issues, you can help maintain its appearance and ensure it remains a beautiful and durable part of your home or project.