How To Connect Iphone To Mac
Here is the introduction paragraph: Connecting your iPhone to your Mac can be a game-changer for productivity, entertainment, and convenience. With a seamless connection, you can easily transfer files, share screens, and access your iPhone's content on your Mac. But, have you ever wondered how to establish this connection? Fortunately, there are multiple ways to connect your iPhone to your Mac, including via USB, Wi-Fi, and Bluetooth. In this article, we will explore each of these methods in detail, starting with the most straightforward and widely used approach: connecting your iPhone to your Mac via USB. By the end of this article, you'll be able to choose the method that best suits your needs and enjoy a hassle-free connection between your iPhone and Mac. So, let's dive in and start with the basics of connecting your iPhone to your Mac via USB.
Connecting iPhone to Mac via USB
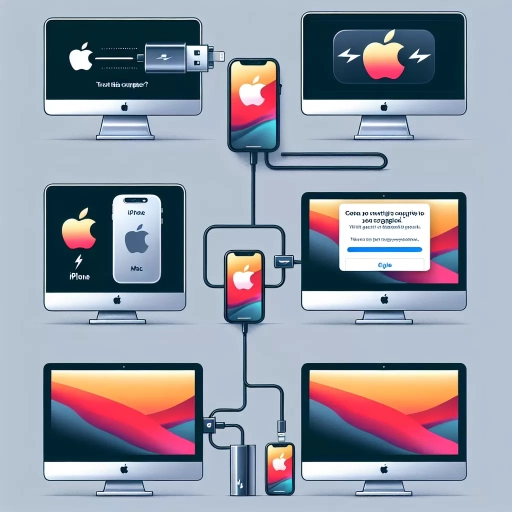
Connecting your iPhone to your Mac via USB is a straightforward process that can be completed in a few simple steps. To start, you will need to use a USB cable to establish a connection between the two devices. This will allow you to transfer data, sync your iPhone, and even use your iPhone as a camera or microphone on your Mac. Once you have connected your iPhone to your Mac, you will need to enable trust on your iPhone to allow the two devices to communicate with each other. This is a security feature that helps to protect your iPhone from unauthorized access. Finally, once you have established a connection and enabled trust, you will be able to access your iPhone's content on your Mac, including your photos, music, and other files. In this article, we will walk you through each of these steps in more detail, starting with using a USB cable to establish a connection.
Using a USB Cable to Establish a Connection
. Using a USB cable to establish a connection between your iPhone and Mac is a straightforward and reliable method. To start, ensure you have a compatible USB cable, preferably the one that came with your iPhone or a certified Apple cable. Connect one end of the cable to your iPhone's Lightning port, located at the bottom of the device. Next, plug the other end of the cable into a free USB port on your Mac. Make sure the port is not damaged or obstructed, as this can prevent a stable connection. Once connected, your Mac should recognize your iPhone and prompt you to trust the device. If you're using a Mac with macOS Catalina or later, you'll see a prompt on your iPhone asking if you trust the computer. Tap "Trust" to establish the connection. If you're using an older version of macOS, you might need to click "Trust" on your Mac instead. After trusting the device, you can use the USB connection to transfer files, sync data, and even charge your iPhone. Keep in mind that using a USB cable to connect your iPhone to your Mac requires a physical connection, so ensure the cable is securely plugged in and not damaged to maintain a stable connection.
Enabling Trust on Your iPhone
. Here is the paragraphy: Enabling Trust on Your iPhone When you connect your iPhone to your Mac via USB, you may be prompted to enable trust on your iPhone. This is a security feature designed to ensure that only authorized devices can access your iPhone's data. To enable trust, follow these steps: 1. Connect your iPhone to your Mac using a USB cable. 2. On your iPhone, you will see a prompt asking if you trust the computer. Tap "Trust" to allow your Mac to access your iPhone's data. 3. If you don't see the prompt, go to your iPhone's Settings app, then tap "General" and "Reset." Tap "Reset Location & Privacy" and then "Reset." 4. Once you've enabled trust, you will be able to access your iPhone's data on your Mac, including photos, music, and other files. Note: If you're using a Mac with macOS Catalina or later, you may need to grant additional permissions to access your iPhone's data. To do this, go to your Mac's System Preferences, then click "Security & Privacy" and select the "Files and Folders" tab. Select the checkbox next to "iPhone" to grant permission. By enabling trust on your iPhone, you can ensure a secure and seamless connection between your devices, allowing you to easily transfer files, sync data, and more.
Accessing iPhone Content on Your Mac
. Accessing iPhone content on your Mac is a seamless process once you've connected your devices. With a USB connection, you can easily transfer files, photos, and other data between your iPhone and Mac. To start, make sure your iPhone is unlocked and your Mac is awake. Then, navigate to the Finder on your Mac and look for your iPhone's name in the sidebar under the "Locations" section. Click on it, and you'll see a summary of your iPhone's content, including storage capacity, software version, and more. From here, you can browse through your iPhone's files, photos, and other data, and even drag and drop files between your devices. You can also use the "Photos" app on your Mac to access and manage your iPhone's photos and videos. Additionally, if you have iCloud set up on both devices, you can access your iPhone's content from your Mac's iCloud Drive, making it easy to share files and collaborate across devices. Overall, accessing iPhone content on your Mac is a convenient and efficient way to manage your digital life.
Connecting iPhone to Mac via Wi-Fi
Connecting your iPhone to your Mac via Wi-Fi is a convenient way to transfer files, sync data, and even use your iPhone as a remote control for your Mac. To establish a seamless connection between the two devices, you'll need to enable Wi-Fi on both your iPhone and Mac, use AirDrop to transfer files, and configure Wi-Fi syncing on your Mac. By following these simple steps, you can enjoy a hassle-free and efficient way to share content between your devices. In this article, we'll explore the process of connecting your iPhone to your Mac via Wi-Fi, starting with the first step: enabling Wi-Fi on both devices. By doing so, you'll be able to lay the foundation for a strong and reliable connection between your iPhone and Mac. So, let's get started by enabling Wi-Fi on both devices.
Enabling Wi-Fi on Both Devices
. To enable Wi-Fi on both devices, start by ensuring that your iPhone and Mac are in close proximity to each other. On your iPhone, navigate to the Settings app, which is represented by a gear icon. Scroll down and select "Wi-Fi" from the list of options. Toggle the switch next to "Wi-Fi" to the right, turning it green. This will activate your iPhone's Wi-Fi capabilities. Next, select your network from the list of available options. If prompted, enter your network's password to connect. On your Mac, click the Wi-Fi icon in the top right corner of the screen, represented by a series of curved lines. Select your network from the dropdown list, and enter your password if required. Ensure that both devices are connected to the same network for a seamless connection. Once both devices are connected to Wi-Fi, you can proceed with connecting your iPhone to your Mac via Wi-Fi. This will allow you to transfer files, share screens, and access other features between the two devices. By following these simple steps, you can establish a reliable and efficient connection between your iPhone and Mac using Wi-Fi.
Using AirDrop to Transfer Files
. AirDrop is a convenient feature that allows you to transfer files between Apple devices, including iPhones and Macs, without the need for cables or internet connections. To use AirDrop to transfer files from your iPhone to your Mac, make sure both devices are connected to the same Wi-Fi network and have Bluetooth enabled. On your iPhone, go to the Control Center, tap on "AirDrop," and select "Everyone" to make your device discoverable. On your Mac, click on the AirDrop icon in the Finder sidebar or go to "Go" > "AirDrop" in the menu bar. Your iPhone should appear in the list of nearby devices. Select your iPhone and the files you want to transfer, and click "Send." On your Mac, you'll receive a notification asking you to accept the files. Click "Accept" to start the transfer process. You can also use AirDrop to transfer files from your Mac to your iPhone by following the same steps in reverse. AirDrop is a quick and easy way to transfer files between your Apple devices, and it's especially useful when you need to share large files or multiple files at once. By using AirDrop, you can keep your devices connected and your files organized, making it easier to work and play across multiple devices.
Configuring Wi-Fi Syncing on Your Mac
. Configuring Wi-Fi syncing on your Mac is a straightforward process that allows you to sync your iPhone with your computer without the need for a physical connection. To start, make sure that your Mac and iPhone are connected to the same Wi-Fi network. Then, open iTunes on your Mac and select your iPhone from the top left corner of the iTunes window. Click on "Summary" and then check the box next to "Sync with this iPhone over Wi-Fi." You will then be prompted to enter your iPhone's passcode to confirm the connection. Once you've done this, your iPhone will be synced with your Mac whenever both devices are connected to the same Wi-Fi network. You can also set up automatic syncing by clicking on "Sync" and then selecting "Automatically sync when this iPhone is connected." This way, your iPhone will sync with your Mac whenever it's connected to the same Wi-Fi network, ensuring that your data is always up to date. Additionally, you can also use the "Wi-Fi Sync" option in the iTunes preferences to customize your syncing settings, such as setting a specific time for syncing or choosing which data to sync. By configuring Wi-Fi syncing on your Mac, you can enjoy the convenience of wireless syncing and keep your iPhone and Mac in perfect sync.
Connecting iPhone to Mac via Bluetooth
Connecting your iPhone to your Mac via Bluetooth can be a convenient way to transfer files, share internet connections, and even use your iPhone as a remote control for your Mac. To establish a Bluetooth connection between your iPhone and Mac, you'll need to follow a few simple steps. First, you'll need to enable Bluetooth on both devices, which will allow them to detect and communicate with each other. Next, you'll need to pair your iPhone with your Mac, which will establish a secure connection between the two devices. Finally, you can use Bluetooth to transfer files between your iPhone and Mac, making it easy to share photos, documents, and other data. In this article, we'll walk you through each of these steps in detail, starting with the first step: enabling Bluetooth on both devices.
Enabling Bluetooth on Both Devices
. To enable Bluetooth on both devices, start by locating the Bluetooth settings on your iPhone and Mac. On your iPhone, go to the Settings app, then tap on "Bluetooth" and toggle the switch to the right to turn it on. You'll know it's on when the switch turns green. On your Mac, click on the Apple menu and select "System Preferences," then click on "Bluetooth." If Bluetooth is not already on, click on the "Turn Bluetooth On" button. Once Bluetooth is enabled on both devices, they will begin to search for available devices to pair with. Make sure both devices are in close proximity to each other to ensure a successful connection. You may see a list of available devices on your iPhone or Mac, so select the name of the device you want to pair with. If prompted, enter the passcode or confirm the pairing request on both devices. Once paired, you'll see a confirmation message on both devices, and you can start using Bluetooth to transfer files, make calls, or stream music between your iPhone and Mac. It's essential to note that Bluetooth connections can be affected by physical barriers, such as walls or furniture, so try to keep both devices in the same room for optimal connectivity. Additionally, ensure that both devices are running the latest software updates, as outdated software can cause connectivity issues. By following these simple steps, you can easily enable Bluetooth on both your iPhone and Mac, setting the stage for a seamless and convenient connection between the two devices.
Pairing Your iPhone with Your Mac
. Pairing your iPhone with your Mac is a seamless process that allows you to share files, photos, and more between the two devices. To start, make sure both your iPhone and Mac are running the latest software and are connected to the same Wi-Fi network. On your Mac, click the Apple menu and select "System Preferences," then click "Bluetooth." On your iPhone, go to "Settings" and tap "Bluetooth." If your iPhone is not already discoverable, tap "Make Discoverable" or "Discoverable" to make it visible to your Mac. Next, on your Mac, select your iPhone from the list of available devices and click "Connect." You may be prompted to enter a code on your iPhone to confirm the connection. Once paired, you can use features like AirDrop to transfer files between your iPhone and Mac, or use Continuity to start something on one device and pick it up where you left off on the other. You can also use your iPhone as a remote control for your Mac, or use your Mac's keyboard to type on your iPhone. With pairing, the possibilities are endless, and you can enjoy a more streamlined and connected experience between your iPhone and Mac.
Transferring Files via Bluetooth
. Transferring files via Bluetooth is a convenient and wireless way to share data between devices, including between an iPhone and a Mac. To transfer files via Bluetooth, both devices must have Bluetooth capabilities and be paired with each other. On the iPhone, go to Settings > Bluetooth and make sure it is turned on. On the Mac, click the Apple menu and select System Preferences > Bluetooth. Once both devices are discoverable, they should appear in each other's Bluetooth lists. Select the device you want to connect to, and follow the prompts to complete the pairing process. Once paired, you can transfer files by selecting the file you want to share on one device and choosing the "Share" option. Select "Bluetooth" as the sharing method, and choose the paired device from the list. The file will then be transferred wirelessly to the other device. It's worth noting that Bluetooth file transfer can be slower than other methods, such as AirDrop or cloud sharing, but it can be a useful option when other methods are not available. Additionally, Bluetooth file transfer can be used to transfer files between devices that do not have internet connectivity, making it a useful option in certain situations. Overall, transferring files via Bluetooth is a convenient and easy way to share data between devices, and can be a useful tool in a variety of situations.