How To Record Your Screen On Iphone
Screen recording on iPhone is a powerful tool that can be used in various ways, from creating tutorials and demonstrations to capturing gameplay and sharing experiences with others. With the ability to record your screen, you can showcase your skills, provide feedback, and even create engaging content for social media. But why would you want to record your screen on your iPhone in the first place? In this article, we will explore the reasons behind screen recording, discuss the different methods to record your screen on iPhone, and provide tips on editing and sharing your screen recordings. Whether you're a gamer, educator, or social media influencer, learning how to record your screen on iPhone can open up new possibilities for creativity and communication. So, let's dive in and explore the benefits of screen recording on iPhone, starting with the question: Why Record Your Screen on iPhone?
Why Record Your Screen on iPhone?
Screen recording on an iPhone is a powerful tool that can be used in various ways to enhance productivity, creativity, and communication. By recording your screen, you can create informative tutorials and guides, record impressive gameplay, and document bugs and issues for troubleshooting purposes. For instance, if you're an educator or a business owner, you can create step-by-step tutorials to teach your students or employees how to use a particular app or software. This can be especially helpful for complex tasks that require visual guidance. By recording your screen, you can provide clear and concise instructions that can be easily followed, making it an effective way to share knowledge and skills. In this article, we'll explore the benefits of screen recording on an iPhone, starting with one of its most popular uses: creating tutorials and guides.
Creating Tutorials and Guides
Creating tutorials and guides is an excellent way to share knowledge, showcase expertise, and provide value to others. By recording your screen on your iPhone, you can create high-quality video tutorials that demonstrate complex processes, software applications, or techniques. This can be particularly useful for educators, trainers, and professionals who need to create instructional content for their students, clients, or colleagues. For instance, you can record a tutorial on how to use a specific app, software, or tool, and share it with others who may be struggling to understand its functionality. Additionally, creating tutorials and guides can also help you to establish yourself as an authority in your field, build your personal brand, and increase your online presence. By sharing your knowledge and expertise through video tutorials, you can attract new followers, build trust with your audience, and ultimately drive more traffic to your website or social media channels. Furthermore, recording your screen on your iPhone also allows you to create guides for personal projects, such as DIY tutorials, cooking recipes, or travel guides. You can share these guides with friends and family, or publish them online to reach a wider audience. Overall, creating tutorials and guides is a great way to share your knowledge, showcase your expertise, and provide value to others, and recording your screen on your iPhone makes it easy to do so.
Recording Gameplay
Recording gameplay on your iPhone can be a fun and creative way to share your gaming experiences with others. Whether you're a casual gamer or a professional esports player, recording your gameplay can help you improve your skills, create entertaining content, and connect with like-minded gamers. With the built-in Screen Recording feature on iPhone, you can easily capture high-quality video and audio of your gameplay, including commentary and reactions. You can record gameplay from any app or game on your iPhone, including popular titles like Fortnite, PUBG, and Minecraft. To get started, simply open the Control Center, tap the Screen Recording icon, and select the app or game you want to record. You can also add a microphone to capture your voice and reactions, making it easy to create engaging commentary and walkthroughs. Once you've finished recording, you can edit and trim your video using the Photos app, add captions and annotations, and share it with friends, family, or online communities. Recording gameplay on your iPhone is a great way to showcase your gaming skills, share tips and strategies, and build a community around your favorite games.
Documenting Bugs and Issues
When it comes to documenting bugs and issues on your iPhone, recording your screen can be a game-changer. By capturing a video of the problem, you can provide developers and support teams with a clear and concise visual representation of the issue, making it easier for them to diagnose and fix the problem. This is especially useful for complex issues that are difficult to describe in writing, or for bugs that only occur under specific circumstances. By recording your screen, you can show exactly what happened, including any error messages, crashes, or other anomalies, allowing developers to see the issue firsthand and understand the root cause of the problem. Additionally, screen recording can also be used to document issues with user interface or user experience, such as navigation problems or unexpected behavior, providing valuable feedback to developers to improve the overall app or system performance. Overall, documenting bugs and issues through screen recording can save time, reduce frustration, and improve the overall quality of the app or system, making it an essential tool for anyone who wants to provide detailed and accurate feedback.
Methods to Record Your Screen on iPhone
Screen recording on an iPhone can be a useful tool for various purposes, such as creating tutorials, recording gameplay, or capturing a problem with your device. Fortunately, there are several methods to record your screen on an iPhone, each with its own set of features and benefits. In this article, we will explore three primary methods to record your screen on an iPhone: using the built-in screen recording feature, using third-party screen recording apps, and using QuickTime Player on a Mac. We will delve into the details of each method, highlighting their advantages and disadvantages. First, let's start with the most straightforward method, which is using the built-in screen recording feature. This feature is easily accessible and doesn't require any additional software or equipment, making it a great option for those who want to quickly record their screen.
Using the Built-in Screen Recording Feature
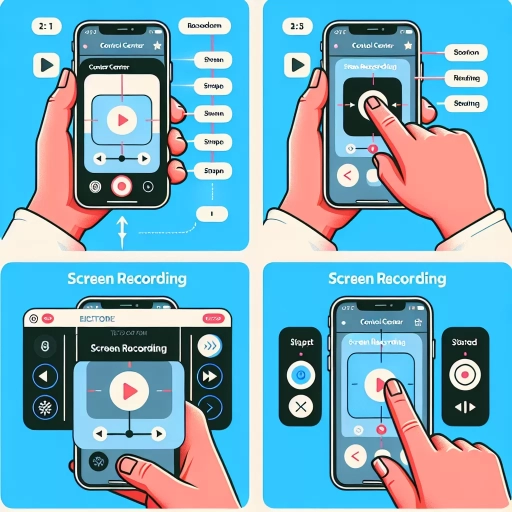
Using the built-in screen recording feature on your iPhone is a straightforward process that allows you to capture your screen activity with ease. To access this feature, go to your iPhone's Settings app, then tap on "Control Center." From there, tap on "Customize Controls" and look for the "Screen Recording" option. Tap the green "+" icon next to it to add it to your Control Center. Once you've added the feature, you can access it by swiping up from the bottom of your screen (or down from the top right corner on iPhone X and later models) to open the Control Center. Tap the screen recording icon, which looks like a white circle within a circle, to start recording. You'll see a three-second countdown before the recording begins. To stop the recording, tap the red status bar at the top of your screen and then tap "Stop." Your screen recording will be saved to your Photos app, where you can edit and share it as needed. You can also use the built-in microphone to record audio while you're screen recording, or turn it off if you prefer. Additionally, you can use the "Microphone" option in the Control Center to switch between the built-in microphone and an external microphone, if you have one connected. Overall, the built-in screen recording feature on your iPhone provides a convenient and easy-to-use way to capture your screen activity, making it perfect for creating tutorials, demos, and more.
Using Third-Party Screen Recording Apps
Using third-party screen recording apps is another method to record your screen on iPhone. There are many apps available in the App Store that offer screen recording capabilities, such as ScreenFlow, DU Recorder, and Record It!. These apps often provide more features and customization options compared to the built-in screen recording feature. For example, some apps allow you to record your screen in high definition, add annotations and text overlays, and even edit your recordings within the app. Additionally, some third-party apps may offer more flexibility in terms of recording settings, such as the ability to record at different frame rates or resolutions. However, it's essential to note that some third-party apps may require a subscription or a one-time purchase fee to access all their features. Furthermore, when using third-party apps, you'll need to ensure that they are compatible with your iPhone model and iOS version to avoid any compatibility issues. Overall, using third-party screen recording apps can be a great option if you need more advanced features or customization options for your screen recordings.
Using QuickTime Player on a Mac
Using QuickTime Player on a Mac is a straightforward process that allows you to record your iPhone screen with ease. To get started, connect your iPhone to your Mac using a USB cable. Next, open QuickTime Player on your Mac, which can be found in the Applications folder or by using Spotlight search. Once QuickTime Player is open, click on "File" in the top menu bar and select "New Movie Recording." This will open a new window with a red record button. Click on the arrow next to the record button and select your iPhone as the camera source. You may be prompted to trust the computer on your iPhone, so be sure to tap "Trust" to allow the connection. With your iPhone selected as the camera source, you can now start recording your screen by clicking the red record button. You can also use the keyboard shortcut Command + Option + R to start and stop the recording. To stop the recording, simply click the stop button or use the keyboard shortcut again. Once you've finished recording, you can save the video file to your Mac by clicking "File" and selecting "Save." You can also edit the video using QuickTime Player's built-in editing tools or export it to other video editing software for further editing. Overall, using QuickTime Player on a Mac is a convenient and easy way to record your iPhone screen, making it a great option for creating tutorials, demos, and other screen recordings.
Editing and Sharing Your Screen Recordings
Once you've captured your screen recording, the next step is to edit and share it with others. Editing your screen recording is crucial to make it more engaging, informative, and polished. There are several ways to edit your screen recording, including trimming and cropping your recordings to remove unnecessary parts, adding annotations and markups to highlight important information, and sharing your recordings on social media and online platforms to reach a wider audience. By editing and sharing your screen recordings, you can enhance the viewing experience, convey your message more effectively, and increase engagement. In this article, we will explore the different ways to edit and share your screen recordings, starting with the basics of trimming and cropping your recordings.
Trimming and Cropping Your Recordings
Once you've captured your screen recording, you may want to trim or crop it to remove any unnecessary parts or focus on a specific section. Trimming allows you to cut out the beginning or end of your recording, while cropping enables you to remove unwanted areas from the video. To trim your recording, open the Photos app, select the video, and tap the "Edit" button. From there, you can drag the edges of the timeline to trim the video to your desired length. To crop your recording, tap the "Crop" button and adjust the edges of the frame to remove any unwanted areas. You can also use the "Rotate" button to rotate your video if needed. Additionally, you can use third-party apps, such as InShot or Adobe Premiere Rush, to trim and crop your recordings with more advanced features and precision. These apps often offer additional editing tools, such as splitting, merging, and adding transitions, to help you refine your video. By trimming and cropping your recordings, you can create a more polished and engaging final product that effectively communicates your message.
Adding Annotations and Markups
When it comes to editing and sharing your screen recordings, adding annotations and markups can be a game-changer. Annotations and markups allow you to highlight important information, draw attention to specific areas of the screen, and provide context to your recording. To add annotations and markups to your screen recording on an iPhone, you can use the built-in Markup tool. To access the Markup tool, open the Photos app, select the screen recording you want to edit, and tap the "Edit" button. From there, tap the "Markup" button, which looks like a pen tip. This will open the Markup tool, where you can choose from a variety of tools, including a pen, pencil, and highlighter. You can use these tools to draw, write, and highlight different areas of the screen. Additionally, you can also add text, arrows, and other shapes to your recording. Once you've added your annotations and markups, you can save your edited recording and share it with others. The Markup tool is a powerful feature that can help you communicate more effectively and make your screen recordings more engaging. By adding annotations and markups, you can provide additional context and clarity to your recording, making it easier for others to understand and follow along. Whether you're creating a tutorial, demonstrating a new feature, or simply sharing a funny moment, annotations and markups can help you get your point across and make your screen recording more effective.
Sharing Your Recordings on Social Media and Online Platforms
When you're ready to share your screen recordings with the world, there are numerous social media and online platforms where you can upload and showcase your content. YouTube is an excellent choice for sharing longer-form videos, such as tutorials, walkthroughs, or product demos. You can also share shorter clips on Instagram, TikTok, or Twitter, which are ideal for quick tips, sneak peeks, or behind-the-scenes content. If you're looking to share your recordings with a more professional audience, LinkedIn or Vimeo might be a better fit. Additionally, you can also share your recordings on online communities like Reddit, Discord, or Facebook Groups, depending on your target audience and the type of content you're sharing. Before uploading, make sure to edit and optimize your recordings for each platform's specific requirements and audience. You can also add captions, tags, and descriptions to make your content more discoverable and engaging. By sharing your screen recordings on social media and online platforms, you can increase your online presence, build your personal brand, and connect with your audience in a more visual and interactive way.