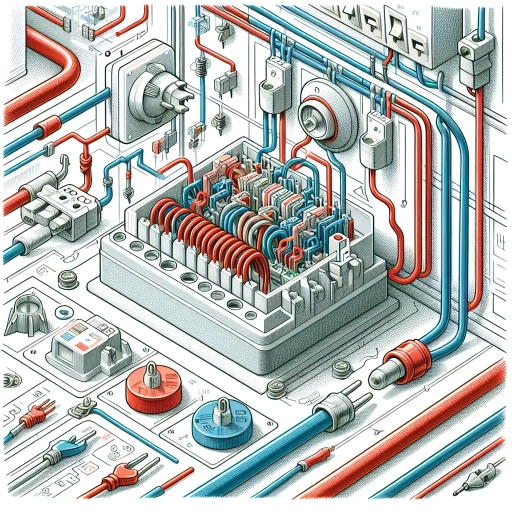
What Is The Red Wire In Electrical
In the complex world of electrical systems, understanding the various components and their roles is crucial for safety, efficiency, and effective troubleshooting. Among these components, the red wire stands out as a critical element that requires careful attention. This article delves into the significance of the red wire, providing a comprehensive guide for both professionals and DIY enthusiasts. We will explore **Understanding the Role of the Red Wire in Electrical Systems**, where we explain its function and importance within different types of circuits. Additionally, we will cover **Identifying and Working with Red Wires Safely**, offering practical tips on how to handle these wires without risking injury or damage. Finally, we will address **Troubleshooting and Repairing Issues with Red Wires**, providing step-by-step guidance on diagnosing and fixing common problems. By the end of this article, you will be well-equipped to navigate the intricacies of red wires confidently. Let's begin by **Understanding the Role of the Red Wire in Electrical Systems**, where we uncover the fundamental purpose and application of this vital component.
Understanding the Role of the Red Wire in Electrical Systems
Understanding the role of the red wire in electrical systems is crucial for both safety and functionality. The red wire, often associated with positive polarity or hot leads, plays a pivotal role in circuitry, safety considerations, and various applications. In terms of **Function in Circuitry**, the red wire is essential for completing electrical circuits, ensuring that power flows correctly and efficiently. This understanding is fundamental for any electrical installation or repair. **Safety Considerations** are equally important, as misidentifying or misusing the red wire can lead to electrical shocks, fires, or other hazards. Proper identification and handling of the red wire are critical to prevent such risks. Furthermore, **Common Applications** of the red wire span across residential, commercial, and industrial settings, including wiring for lighting, appliances, and complex machinery. Recognizing its specific uses helps in designing and maintaining safe and efficient electrical systems. By delving into these aspects, we can gain a comprehensive understanding of the red wire's significance. Let's start by examining its **Function in Circuitry**, where we will explore how it integrates into various electrical circuits to ensure reliable operation.
1. Function in Circuitry
In the intricate world of circuitry, understanding the function of each component is crucial for ensuring the safe and efficient operation of electrical systems. Among these components, the red wire plays a significant role, often serving as a critical part of the circuit's structure. The red wire is typically associated with the "hot" or live conductor in a circuit, meaning it carries electrical current from the power source to various devices or components. This distinction is vital because it helps electricians and DIY enthusiasts identify which wires are live and which are neutral or ground, thereby reducing the risk of electrical shock or short circuits. The primary function of the red wire in circuitry is to facilitate the flow of electrical energy. In a standard residential electrical system, for example, the red wire might be part of a 240-volt circuit used for appliances such as electric dryers or air conditioners. Here, it works in tandem with a black wire (another hot conductor) and a white wire (neutral) to complete the circuit. The red wire's role can vary depending on the specific application; in some cases, it may be used as a secondary hot wire in three-way or four-way switch configurations, allowing for more complex lighting control scenarios. Moreover, the color-coding of wires like the red wire is standardized to enhance safety and clarity. According to the National Electric Code (NEC), red wires are designated for specific uses to avoid confusion and ensure that electrical work is done correctly. For instance, in a multi-conductor cable, red wires might indicate a particular phase or function within the circuit, making it easier for technicians to trace and diagnose issues. In addition to its functional role, understanding the red wire's place in circuitry also underscores the importance of proper installation and maintenance practices. Incorrectly wiring a circuit can lead to dangerous conditions such as overheating, arcing, or even fires. Therefore, it is essential that anyone working with electrical systems respects the designated roles of each wire color and follows established safety protocols. In summary, the red wire in circuitry serves as a critical component by carrying electrical current and facilitating the operation of various devices within an electrical system. Its standardized color-coding ensures safety and clarity during installation and maintenance tasks. Recognizing its function is fundamental to understanding how electrical systems work and how they should be managed to prevent hazards and ensure reliable performance. By appreciating the role of the red wire, individuals can better navigate the complexities of circuitry and contribute to safer, more efficient electrical environments.
2. Safety Considerations
When delving into the role of the red wire in electrical systems, it is paramount to emphasize the critical importance of safety considerations. The red wire, often associated with the "hot" or live conductor, carries electrical current and poses significant risks if not handled properly. Here are some key safety considerations that must be adhered to when working with electrical systems involving red wires. First and foremost, **personal protective equipment (PPE)** is essential. This includes wearing insulated gloves, safety glasses, and a hard hat to protect against electrical shock and potential arc flashes. Ensuring that all tools are insulated and rated for the voltage being worked on is also crucial. **Lockout/Tagout (LOTO) procedures** must be strictly followed to prevent accidental start-up of equipment while maintenance or repairs are being performed. This involves disconnecting power sources and locking them out to ensure no one can inadvertently turn the system back on. **Proper grounding** is another critical aspect. Ensuring that all equipment and tools are properly grounded helps prevent electrical shock by providing a safe path for current to flow to the ground if there is a fault. **Visual inspections** should always precede any work on electrical systems. Checking for signs of wear, damage, or overheating in the red wire or any other components can help identify potential hazards before they become dangerous. **Following local and national electrical codes** is mandatory. These codes provide guidelines that have been developed based on extensive research and experience to ensure safe practices. Compliance with these standards helps mitigate risks associated with electrical work. Additionally, **working with a qualified electrician** is highly recommended, especially for complex tasks. Professional electricians have the training and experience necessary to handle electrical systems safely and efficiently. In situations where **live work** cannot be avoided, using specialized equipment such as voltage testers and non-contact voltage detectors can help identify whether a circuit is live before touching it. These tools are invaluable in preventing accidental contact with live wires. Lastly, maintaining **good housekeeping** in the workspace is vital. Keeping the area clean and organized reduces the risk of tripping over tools or wires, which can lead to accidents. By adhering to these safety considerations, individuals can significantly reduce the risks associated with working on electrical systems involving red wires. Understanding these principles not only enhances safety but also underscores the importance of respecting the power of electricity and the critical role that proper safety protocols play in preventing injuries and fatalities.
3. Common Applications
In electrical systems, the red wire plays a crucial role in various applications, each requiring precise understanding and handling to ensure safety and functionality. One of the most common applications of the red wire is in residential wiring, where it typically serves as a "hot" conductor. Here, it carries electrical current from the main electrical panel to outlets, switches, and lighting fixtures. For instance, in a standard 120/240-volt residential circuit, the red wire often connects to the second "hot" leg of a 240-volt circuit, such as those used for electric dryers or water heaters. This distinction is critical because it allows for the distribution of higher voltage when needed while maintaining compatibility with standard household appliances. Another significant application of the red wire is in automotive electrical systems. In vehicles, red wires are frequently used to indicate positive (+) connections, particularly in battery circuits. For example, the red wire from the battery connects directly to the starter motor and other essential components like the ignition system and fuel pump. This color coding helps technicians and mechanics quickly identify positive leads during repairs or diagnostics, reducing the risk of electrical shock or damage to components. In industrial settings, red wires are often utilized in control circuits and alarm systems. For example, in industrial control panels, red wires might be used to signal alarm conditions or indicate the status of machinery. This visual cue is vital for operators who need to monitor multiple systems simultaneously. Additionally, in industrial automation, red wires can be part of safety interlock circuits that prevent machinery from operating under unsafe conditions. This ensures that equipment operates within specified parameters and minimizes the risk of accidents. Understanding these applications underscores the importance of adhering to color-coding standards in electrical work. Misidentifying a red wire can lead to serious safety hazards, including electrical shock or fire. Therefore, it is essential for electricians, technicians, and anyone working with electrical systems to be well-versed in the role and significance of the red wire across different contexts. By recognizing its function in residential, automotive, and industrial settings, individuals can ensure that electrical systems are installed, maintained, and repaired safely and efficiently. This knowledge not only enhances safety but also contributes to the overall reliability and performance of electrical systems.
Identifying and Working with Red Wires Safely
When working with electrical systems, identifying and handling red wires safely is crucial to prevent accidents and ensure the integrity of the circuit. Red wires, often associated with positive or "hot" connections, require careful attention to avoid electrical shock or fire hazards. To navigate these risks effectively, it is essential to understand three key aspects: color coding standards, the tools and equipment needed, and best practices for handling. Color coding standards provide a universal language that helps technicians quickly identify the function of each wire. Knowing these standards can significantly reduce the risk of misconnection and subsequent electrical hazards. However, merely recognizing the color is not enough; having the right tools and equipment is also vital. Proper tools such as insulated pliers, wire strippers, and voltage testers ensure that the work is done safely and efficiently. Finally, adhering to best practices for handling red wires, such as turning off the power supply before starting work and using personal protective equipment, further minimizes the risk of injury. By combining these elements—understanding color coding standards, utilizing appropriate tools and equipment, and following best practices—technicians can ensure their safety and the reliability of the electrical system. Let's start by delving into the critical role of **Color Coding Standards** in identifying and working with red wires safely.
1. Color Coding Standards
**Color Coding Standards** In the realm of electrical wiring, color coding standards are crucial for ensuring safety and efficiency. These standards serve as a universal language, allowing electricians and non-professionals alike to quickly identify the purpose and voltage of wires. The National Electric Code (NEC) in the United States, along with international standards such as those set by the International Electrotechnical Commission (IEC), dictate specific color codes for different types of wires. For instance, black wires typically carry 120-volt power, while white wires are usually neutral. Green or bare copper wires are designated for grounding, providing a safe path to earth in case of an electrical fault. Red wires, the focus of our discussion, have specific roles depending on the context. In residential wiring, red wires often indicate a secondary "hot" wire in a 240-volt circuit, such as those used for electric dryers or air conditioning units. In automotive wiring, red wires can signify positive battery connections or ignition circuits. Understanding these color codes is essential for identifying and working with red wires safely. Misidentifying a wire can lead to serious electrical shocks or even fatalities. The importance of adhering to these color coding standards cannot be overstated. It ensures that electrical systems are installed correctly and maintained safely over time. For example, if a red wire is mistakenly connected to a neutral terminal, it could create a hazardous situation where an appliance or circuit is energized unexpectedly. Conversely, following the standards ensures that repairs and modifications are carried out with minimal risk. Moreover, color coding facilitates communication among professionals working on electrical projects. When multiple electricians are involved in a project, uniform color coding helps prevent confusion and errors. This consistency also aids in troubleshooting; if a problem arises, identifying the correct wires based on their colors can significantly reduce the time spent diagnosing the issue. In addition to safety and efficiency, color coding standards contribute to regulatory compliance. Electrical inspectors rely on these standards to verify that installations meet safety requirements. Non-compliance can result in failed inspections, costly rework, and potential legal liabilities. For individuals working with electrical systems, whether they are professionals or DIY enthusiasts, familiarity with color coding standards is paramount. It empowers them to perform tasks confidently and safely. When it comes to red wires specifically, knowing their designated roles helps in avoiding dangerous mistakes and ensures that electrical work is done correctly. In summary, color coding standards are a cornerstone of electrical safety and efficiency. By adhering to these standards, individuals can ensure that their work is compliant, safe, and effective. For those working with red wires, understanding their specific roles within these standards is critical for safe and successful electrical work.
2. Tools and Equipment Needed
When it comes to identifying and working with red wires safely, having the right tools and equipment is paramount. This ensures not only your safety but also the integrity of the electrical system you are working on. Here are some essential tools and equipment you should have at your disposal: 1. **Multimeter**: A multimeter is a versatile tool that allows you to measure voltage, current, resistance, and continuity. It is crucial for verifying whether a red wire is live or not before you start any work. Always use a multimeter with a high voltage rating to avoid damage or injury. 2. **Insulated Pliers and Screwdrivers**: These tools are designed to protect you from electrical shock. Insulated pliers can be used to grip wires without coming into contact with the conductor, while insulated screwdrivers prevent accidental contact with live components. 3. **Wire Strippers**: Wire strippers are necessary for removing insulation from the ends of wires without damaging the conductor. This is particularly important when you need to connect or disconnect red wires safely. 4. **Voltage Tester**: A voltage tester, also known as a non-contact voltage tester, can quickly indicate if a wire is live without needing to touch it. This tool is invaluable for ensuring your safety before starting any electrical work. 5. **Safety Goggles and Gloves**: Protective gear such as safety goggles and insulated gloves provide an extra layer of protection against electrical shock and physical injury. They should be worn whenever you are working with electrical systems. 6. **Circuit Breaker or Fuse Puller**: If you need to work on a circuit that includes red wires, it's often necessary to de-energize the circuit first. A circuit breaker or fuse puller helps you safely switch off power at the main electrical panel. 7. **Wire Connectors and Lugs**: When reconnecting red wires, using high-quality wire connectors and lugs ensures secure connections that minimize the risk of electrical hazards like short circuits or arcing. 8. **Work Light**: Good lighting is essential for clear visibility when working in tight spaces or with complex wiring systems. A work light can help you identify red wires more easily and reduce the risk of mistakes. 9. **First Aid Kit**: Although not directly related to the tools needed for working with red wires, having a first aid kit nearby is always a good practice in case of any accidents or injuries. 10. **Electrical Diagrams and Manuals**: Having access to electrical diagrams and manuals specific to the system you are working on can provide valuable information about the function and location of red wires, helping you navigate safely. By ensuring you have these tools and equipment readily available, you can significantly reduce the risks associated with working with red wires and maintain a safe working environment. Always remember that safety should be your top priority when dealing with electrical systems.
3. Best Practices for Handling
When it comes to identifying and working with red wires safely, adhering to best practices is paramount to avoid electrical shocks, injuries, and even fatalities. Here are three critical best practices to ensure your safety: 1. **Proper Identification and Labeling**: Always start by correctly identifying the red wire within the electrical circuit. Red wires are typically used as "hot" wires, carrying live electrical current. However, their specific function can vary depending on the circuit type—whether it's a 120V single-phase, 240V single-phase, or a three-phase system. Use color-coded labels and diagrams to clearly mark each wire's purpose. This step is crucial because misidentifying a wire can lead to dangerous situations. 2. **Use of Personal Protective Equipment (PPE)**: Before handling any electrical wiring, including red wires, ensure you are equipped with the appropriate PPE. This includes insulated gloves, safety glasses, and a non-conductive hard hat. These protective measures help prevent electrical shock and protect you from other potential hazards such as arc flashes or flying debris. Additionally, make sure your workspace is well-lit and free from any conductive materials that could inadvertently complete a circuit. 3. **De-energizing the Circuit**: Prior to any work on electrical wiring, it is essential to de-energize the circuit completely. This involves switching off the power supply at the main electrical panel or breaker box and verifying that there is no voltage present using a reliable voltage tester. Never rely solely on visual indicators like switches or circuit breakers; always test for voltage to ensure your safety. Once you have confirmed that the circuit is de-energized, you can proceed with confidence knowing that you are not at risk of an electrical shock. By following these best practices—proper identification and labeling, use of PPE, and de-energizing the circuit—you significantly reduce the risks associated with handling red wires and other electrical components. These steps not only protect you but also ensure that any work done on electrical systems is carried out safely and efficiently. Remember, safety should always be your top priority when dealing with electricity.
Troubleshooting and Repairing Issues with Red Wires
When dealing with issues involving red wires, whether in electrical systems, automotive wiring, or any other context, it is crucial to approach the problem methodically to ensure safety and efficiency. Troubleshooting and repairing red wire issues can be complex, but breaking down the process into manageable steps can simplify the task. This article will guide you through three key areas: diagnosing faults and short circuits, replacement and splicing techniques, and preventative maintenance tips. By understanding how to diagnose faults and short circuits, you can identify the root cause of the problem quickly. Once the issue is identified, knowing the proper replacement and splicing techniques is essential for a reliable repair. Finally, implementing preventative maintenance tips can help avoid future problems. In this comprehensive guide, we will start by exploring the critical step of diagnosing faults and short circuits, which sets the foundation for effective troubleshooting and repair. By mastering this initial phase, you will be better equipped to tackle any red wire issue that arises. Let's begin with the first crucial step: diagnosing faults and short circuits.
1. Diagnosing Faults and Short Circuits
Diagnosing faults and short circuits is a critical step in troubleshooting and repairing electrical issues, particularly when dealing with red wires. Red wires, often used as hot wires in electrical circuits, carry live voltage and are prone to various types of faults. To diagnose these issues effectively, one must employ a systematic approach that combines visual inspection, measurement tools, and logical reasoning. First, **visual inspection** is essential. Look for signs of physical damage such as cuts, frays, or burn marks on the red wire. Check connections for looseness or corrosion, which can cause intermittent or complete loss of power. Ensure that all connections are secure and free from debris. Next, **use appropriate tools** to measure voltage and continuity. A multimeter is indispensable for this task. Set the multimeter to the DC voltage function to check if the red wire is carrying the expected voltage at various points in the circuit. If the voltage is absent or lower than expected, it may indicate a fault upstream. **Continuity testing** helps identify breaks in the wire. Using the continuity function on your multimeter, touch the leads to both ends of the suspected section of wire; if there is no beep or light indicating continuity, there is likely a break in that section. Another crucial step involves **isolating sections** of the circuit to pinpoint where the fault lies. This can be done by disconnecting parts of the circuit systematically and retesting each section until you find where power is lost. **Short circuits** are particularly dangerous and must be identified quickly. A short circuit occurs when there is an unintended path of electricity between two points in a circuit, often causing excessive current flow and potentially leading to overheating or fire. Use a multimeter set to ohms to check for resistance; if you find near-zero resistance between two points that should not be connected, it indicates a short circuit. In addition to these technical steps, **safety precautions** are paramount. Always ensure that power to the circuit is turned off before performing any diagnostic tests or repairs. Use personal protective equipment such as insulated gloves and safety glasses to protect against electrical shock. Finally, **documenting your findings** can help in future troubleshooting efforts. Keeping a record of which sections were tested and what results were obtained can streamline future diagnostics by providing a baseline understanding of how different parts of the circuit function under normal conditions. By following these steps—visual inspection, tool-based measurement, section isolation, short circuit identification, adherence to safety protocols, and thorough documentation—you can efficiently diagnose faults and short circuits involving red wires. This methodical approach not only ensures accurate diagnosis but also enhances your ability to repair issues effectively while minimizing risks associated with electrical work.
2. Replacement and Splicing Techniques
When troubleshooting and repairing issues with red wires, understanding replacement and splicing techniques is crucial for ensuring safety and efficiency. The red wire, often associated with the "hot" or live conductor in electrical systems, requires careful handling to avoid potential hazards such as electrical shock or fire. **Replacement Techniques:** - **Identification:** Before replacing a red wire, it is essential to identify its function within the circuit. This involves consulting the wiring diagram or schematic of the electrical system to determine if it is part of a single-phase or three-phase circuit. - **Disconnection:** Safely disconnect the power supply to the circuit by switching off the main breaker or fuse. Verify that there is no voltage present using a non-contact voltage tester. - **Removal:** Carefully remove the old wire from its connections, taking note of any wire nuts, connectors, or terminals that may need to be reused. - **Inspection:** Inspect the new wire for any damage or defects before installation. Ensure it matches the specifications of the original wire in terms of gauge, insulation type, and color coding. - **Installation:** Connect the new red wire securely to its terminals or connectors, ensuring all connections are tight and not loose. Use wire nuts or connectors that are rated for the voltage and current of the circuit. **Splicing Techniques:** - **Preparation:** When splicing a red wire, prepare the area by cleaning it of any debris or insulation damage. Use wire strippers to expose a sufficient length of conductor at both ends of the splice. - **Twisting:** Twist the exposed conductors together tightly to ensure good contact. For added security, use a twist connector or wire nut that is specifically designed for splicing. - **Insulation:** Apply electrical tape or heat shrink tubing over the splice to insulate it properly. This prevents moisture from entering the splice and reduces the risk of short circuits. - **Testing:** After completing the splice, turn the power back on and test the circuit using a multimeter to ensure there are no voltage drops or shorts. **Safety Considerations:** - Always follow local electrical codes and regulations when performing replacements or splices. - Use personal protective equipment (PPE) such as gloves and safety glasses to protect against electrical shock. - Ensure all tools used are insulated and rated for the voltage of the circuit being worked on. By adhering to these replacement and splicing techniques, you can effectively troubleshoot and repair issues with red wires while maintaining safety standards. Properly executed repairs not only restore functionality but also prevent future complications that could arise from substandard workmanship. This meticulous approach underscores the importance of precision in electrical work, where even minor errors can have significant consequences.
3. Preventative Maintenance Tips
Preventative maintenance is a crucial aspect of ensuring the longevity and safety of electrical systems, particularly when dealing with red wires, which often signify live or hot wires. Here are three preventative maintenance tips to help you avoid common issues and ensure your electrical setup remains in optimal condition. **1. Regular Inspection:** Regular inspections are fundamental in identifying potential problems before they escalate into major issues. Schedule periodic checks to visually inspect your wiring, including red wires, for signs of wear, damage, or deterioration. Look for frayed insulation, exposed conductors, and any signs of overheating such as discoloration or burn marks. Use a multimeter to test for voltage and continuity to ensure that all connections are secure and functioning correctly. This proactive approach can help prevent electrical fires and shocks. **2. Proper Labeling and Documentation:** Proper labeling and documentation of your electrical system can significantly reduce the risk of errors during maintenance or repairs. Ensure that all wires, including red ones, are clearly labeled with their purpose and voltage rating. Maintain detailed diagrams and records of your electrical setup, including any modifications or repairs made over time. This documentation will be invaluable when troubleshooting issues or performing routine maintenance, helping you avoid confusion and potential hazards. **3. Secure Connections:** Secure connections are essential for preventing electrical issues. Ensure that all connections involving red wires are tight and secure. Use the appropriate connectors and terminals designed for the specific gauge of wire you are working with. Avoid over-tightening, which can damage the wire or connector, but ensure they are snug enough to prevent loose connections that could lead to arcing or overheating. Additionally, consider using wire nuts or connectors with built-in strain relief to protect against mechanical stress that could compromise the integrity of the connection over time. By implementing these preventative maintenance tips, you can significantly reduce the likelihood of encountering issues with red wires and other components of your electrical system. Regular inspections help identify potential problems early, proper labeling ensures clarity and safety during maintenance, and secure connections prevent many common electrical faults. These practices not only extend the life of your electrical system but also enhance safety, making them indispensable for anyone working with electrical wiring.