How To Factory Reset Iphone When Locked
In today's digital age, iPhones have become indispensable tools for daily life, storing a wealth of personal data and memories. However, situations can arise where a factory reset becomes necessary, such as when an iPhone is locked due to forgotten passwords or severe software issues. This article will guide you through the process of factory resetting a locked iPhone, ensuring you understand the underlying reasons for this action, the various methods to achieve it, and the crucial steps to follow afterward. We will begin by **Understanding the Need for a Factory Reset**, exploring why this drastic measure might be required. From there, we will delve into **Methods to Factory Reset a Locked iPhone**, detailing the different approaches you can take to restore your device to its original settings. Finally, we will cover **Post-Reset Steps and Best Practices**, providing essential tips on how to set up your iPhone securely and efficiently after the reset. By the end of this article, you will be equipped with the knowledge to handle a locked iPhone with confidence and precision. Let's start by understanding why a factory reset might be the best solution for your locked iPhone.
Understanding the Need for a Factory Reset
In today's digital age, smartphones like iPhones have become indispensable tools for daily life, storing a vast amount of personal data and serving as hubs for various activities. However, there are times when these devices require a complete overhaul to restore their original functionality. This is where the concept of a factory reset comes into play. Understanding the need for a factory reset is crucial for maintaining the health and performance of your iPhone. You might need to factory reset your iPhone due to issues such as persistent software glitches, malware infections, or simply to prepare the device for resale. Yet, this process comes with significant consequences if not approached carefully; failing to back up your data before initiating the reset can result in irretrievable loss of important information. Therefore, it is essential to take specific precautions before starting the reset process to ensure a smooth transition. By delving into why you might need to factory reset your iPhone, the consequences of not backing up data, and the necessary precautions to take beforehand, we can gain a comprehensive understanding of the need for a factory reset.
Why You Might Need to Factory Reset Your iPhone
When considering the necessity of a factory reset for your iPhone, it's crucial to understand the various scenarios in which this action becomes imperative. A factory reset is essentially a last resort that restores your device to its original settings, erasing all data, apps, and personal preferences. You might need to perform a factory reset if your iPhone is experiencing persistent software issues that cannot be resolved through other means. For instance, if your device is plagued by frequent crashes, freezes, or unexplained errors that hinder its functionality, a factory reset can help start anew with a clean slate. Additionally, if you've encountered malware or other security threats that compromise your device's integrity, a factory reset is often the most effective way to eliminate these risks entirely. Another common reason for a factory reset is when you're preparing to sell or give away your iPhone; this ensures that all personal data is completely wiped from the device, protecting your privacy and security. Furthermore, if you're locked out of your iPhone due to forgotten passwords or other lockout issues, a factory reset might be the only viable solution to regain access to your device. It's also worth noting that sometimes, a factory reset can resolve issues related to poor performance or slow operation by clearing out accumulated data and optimizing system resources. However, it's important to remember that a factory reset will erase all content and settings, so it's essential to back up your data beforehand if possible. By understanding these scenarios, you can make an informed decision about whether a factory reset is the right course of action for resolving your iPhone's issues.
Consequences of Not Backing Up Data Before Reset
When considering a factory reset for your iPhone, especially when it is locked, it is crucial to understand the dire consequences of not backing up your data beforehand. A factory reset erases all content and settings on your device, reverting it to its original state as if it were brand new. Without a backup, you risk losing irreplaceable data such as contacts, photos, messages, and important documents. This can be particularly devastating if you have not synced your device recently or if you rely heavily on your iPhone for personal and professional purposes. For instance, losing cherished family photos or critical work files can be emotionally and professionally crippling. Moreover, any apps you have purchased or downloaded will need to be reinstalled, and while some may be easily recoverable through the App Store, others might require re-purchasing or re-subscribing. Additionally, settings and preferences that you have meticulously customized over time will be reset to default, requiring you to spend hours reconfiguring everything from notification settings to home screen layouts. The loss of data can also lead to significant downtime as you attempt to recreate lost information or wait for responses from contacts whose details you no longer have. In some cases, this could impact your productivity and relationships. Therefore, it is imperative to back up your data using iCloud or iTunes before proceeding with a factory reset to ensure that all your valuable information is safely stored and easily recoverable once the reset is complete. This simple step can save you from the potential chaos and stress associated with data loss, making the process of resetting your iPhone much smoother and less disruptive. By taking this precaution, you can confidently perform a factory reset knowing that your important data is secure and ready to be restored once the process is finished.
Precautions to Take Before Initiating the Reset Process
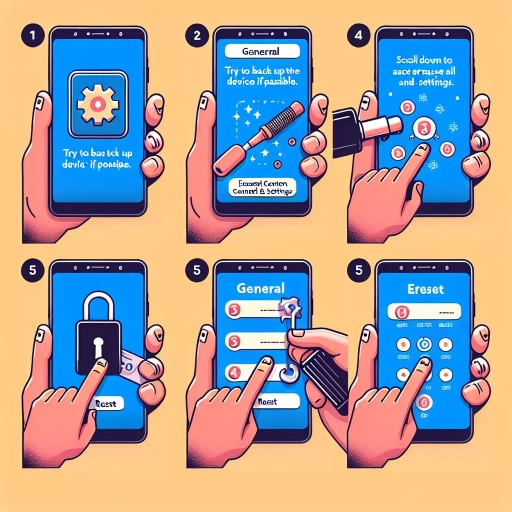
Before initiating the factory reset process on your iPhone, it is crucial to take several precautions to ensure that you do not lose important data and to avoid any potential complications. First and foremost, **back up your data**. Use iCloud or iTunes to create a backup of your iPhone, which will save your contacts, photos, messages, and other valuable information. This step is essential because a factory reset will erase all data on the device, leaving it in its original state as if it were brand new. **Remove SIM Card and Accessories**: Take out the SIM card and any other accessories such as cases or screen protectors. This prevents any accidental damage during the reset process and ensures that you do not misplace these items. **Disable Find My iPhone**: If your iPhone is locked, you may need to disable Find My iPhone before proceeding with the reset. This can usually be done through iCloud if you have access to your Apple ID credentials. Disabling this feature will prevent any activation locks from interfering with the reset process. **Charge Your Device**: Ensure that your iPhone is fully charged or at least has enough battery life to complete the reset process. A factory reset can take some time, and you do not want your device to run out of power mid-process. **Understand Legal Implications**: Be aware of any legal implications associated with resetting a locked iPhone. If the device is not yours or if it has been reported stolen, resetting it could be illegal and may result in serious consequences. **Prepare for Setup**: After the factory reset, you will need to set up your iPhone again. Have your Apple ID and password ready, as well as any other necessary information such as Wi-Fi passwords and email account details. By taking these precautions, you can ensure a smooth and successful factory reset process while protecting your data and avoiding potential issues. Remember that a factory reset is a last resort and should only be performed when absolutely necessary due to its irreversible nature. Always explore other troubleshooting options first before deciding to reset your device.
Methods to Factory Reset a Locked iPhone
When an iPhone becomes locked, whether due to a forgotten passcode or other security issues, performing a factory reset can be the most effective solution. However, this process can be daunting, especially if you're not familiar with the various methods available. This article will guide you through three reliable and straightforward techniques to factory reset a locked iPhone. First, we will explore how to use iTunes to restore your device, a method that leverages the software's built-in capabilities to reset your iPhone. Next, we will delve into utilizing Recovery Mode, which allows you to bypass the lock screen and restore your device directly. Finally, we will discuss the use of the Find My iPhone feature for remote erasure, a convenient option if you have access to another device. By understanding these methods, you'll be well-equipped to handle any situation where a factory reset is necessary. Understanding the need for a factory reset is crucial, as it not only resolves immediate issues but also ensures your device's security and performance are optimized. ### Understanding the Need for a Factory Reset In the following sections, we will dive deeper into each of these methods, providing step-by-step instructions and tips to ensure a smooth process. Whether you're dealing with a forgotten passcode, malware, or simply want to start fresh, knowing how to factory reset your iPhone is an essential skill for any user.
Using iTunes to Restore Your iPhone
When your iPhone is locked and you need to perform a factory reset, using iTunes can be a reliable method. This approach is particularly useful if you have previously synced your device with iTunes, as it allows you to restore your iPhone without needing the passcode. Here’s how you can do it: First, ensure that you have the latest version of iTunes installed on your computer. Connect your iPhone to the computer using a USB cable. If your iPhone is not recognized by iTunes, you may need to put it into recovery mode. To do this, press and hold the Sleep/Wake button and the Volume Down button simultaneously for at least 10 seconds until you see the Apple logo. Release the Sleep/Wake button but continue holding the Volume Down button until your iPhone appears in iTunes. Once your device is detected, you will see an option in iTunes to "Restore iPhone." Click on this option and confirm that you want to restore your iPhone to its factory settings. iTunes will download the necessary software and restore your device, erasing all data and settings in the process. This method effectively bypasses the lock screen, allowing you to start fresh with a completely reset iPhone. It's important to note that restoring your iPhone through iTunes will erase all data on the device, so it's crucial to back up any important information beforehand if possible. Additionally, if you have enabled "Find My iPhone," you will need to disable it before restoring your device. After the restoration process is complete, you can set up your iPhone as new or restore it from a previous backup if available. This method is straightforward and effective for those who have access to a computer with iTunes installed and have previously synced their iPhone with it. In summary, using iTunes to restore a locked iPhone is a viable solution that leverages the existing connection between your device and computer. By following these steps carefully, you can successfully reset your iPhone even when it's locked, making it ready for use again or preparing it for sale or transfer. This method underscores the importance of regularly syncing your device with iTunes to ensure you have options available in case of an emergency like a locked screen.
Utilizing Recovery Mode for a Locked iPhone
When an iPhone is locked, one of the most effective methods to regain access and perform a factory reset is by utilizing Recovery Mode. This mode allows you to restore your device even if it's locked or disabled, making it a crucial tool for troubleshooting and resolving issues related to forgotten passwords or unresponsive screens. To enter Recovery Mode, start by connecting your iPhone to a computer with iTunes installed. For iPhone 8 and later models, press and quickly release the Volume Up button, then press and quickly release the Volume Down button, and finally press and hold the Side button until you see the recovery mode screen. For iPhone 7 and earlier models, press and hold both the Sleep/Wake and Volume Down buttons simultaneously until the recovery mode screen appears. Once in Recovery Mode, iTunes will detect your iPhone and prompt you to either update or restore it. Selecting "Restore" will erase all data on your device and reinstall the latest version of iOS, effectively performing a factory reset. This process is particularly useful if you're unable to access your iPhone due to a forgotten passcode or if the device is disabled after multiple incorrect attempts. It's important to note that using Recovery Mode will result in the loss of all data on your iPhone unless you have previously backed up your device. Therefore, it's advisable to back up your data regularly to avoid losing important information. Additionally, if you're using Find My iPhone, you'll need to disable it before restoring your device. In summary, Recovery Mode provides a reliable solution for factory resetting a locked iPhone by allowing you to bypass the lock screen and restore your device to its original settings. This method is straightforward and can be completed with minimal technical expertise, making it accessible to a wide range of users. By following these steps carefully, you can regain control over your iPhone and start fresh with a clean slate.
Employing Find My iPhone Feature for Remote Erase
When faced with the challenge of factory resetting a locked iPhone, one of the most effective methods involves utilizing the "Find My iPhone" feature to perform a remote erase. This feature, part of Apple's iCloud services, allows users to locate, lock, or erase their device from any other connected device with an internet connection. To employ this method, you must first ensure that "Find My iPhone" was enabled on the locked device before it became inaccessible. If this prerequisite is met, you can proceed by logging into your iCloud account on a computer or another iOS device. Once logged in, navigate to the "Find My iPhone" section and select the locked iPhone from the list of devices associated with your account. Here, you will have several options, including "Erase iPhone." Selecting this option will initiate a remote erase process that completely wipes all data from the device, effectively restoring it to its factory settings. It is crucial to note that this action is irreversible and will delete all content and settings on the iPhone. Before proceeding with the erase, you may be prompted to enter your Apple ID password for verification. After confirming, the process will begin, and you will see a message indicating that the erase is in progress. Depending on the internet connection and the device's current state, this process may take a few minutes to complete. Once finished, your iPhone will restart and display the setup screen as if it were brand new. It is important to remember that for this method to work, the locked iPhone must be connected to the internet and have "Find My iPhone" enabled. Additionally, if you have two-factor authentication (2FA) enabled on your Apple ID, you may need to enter a verification code sent to one of your trusted devices or phone numbers. Employing the "Find My iPhone" feature for remote erase not only provides a convenient solution for factory resetting a locked device but also adds an extra layer of security by ensuring that all personal data is completely erased. This method is particularly useful in situations where physical access to the device is limited or when you need to reset the iPhone urgently. By leveraging this feature, you can restore your iPhone to its original state without needing to physically interact with it, making it an indispensable tool in managing and securing your Apple devices.
Post-Reset Steps and Best Practices
When you decide to perform a factory reset on your iPhone, it's crucial to understand the steps that follow to ensure your device is set up securely and efficiently. A factory reset can be a necessary measure to resolve persistent issues or prepare your iPhone for a new user, but it leaves your device in a pristine state devoid of personal data and settings. To navigate this process smoothly, it's essential to know the best practices for post-reset steps. This article will guide you through three critical phases: **Setting Up Your iPhone After a Factory Reset**, where you'll learn how to configure your device from scratch; **Restoring Data from iCloud or iTunes Backup**, which will help you recover your important files and settings; and **Securing Your iPhone with New Passcodes and Biometrics**, ensuring your device is protected with the latest security measures. By following these steps, you'll be able to restore functionality and security to your iPhone, making it ready for use. Understanding the need for a factory reset is key, and this article will provide you with the comprehensive knowledge required to handle the process effectively.
Setting Up Your iPhone After a Factory Reset
After performing a factory reset on your iPhone, setting it up again is a straightforward process that requires some attention to detail to ensure everything is restored to your liking. Begin by turning on your iPhone and following the on-screen instructions to select your language and country or region. Next, choose your Wi-Fi network or connect to a nearby Wi-Fi hotspot to enable internet access. If you have a SIM card or eSIM, you'll be prompted to insert or activate it. Once connected, you'll reach the "Apps & Data" screen where you can choose how to set up your iPhone. If you've previously backed up your data using iCloud or iTunes, select "Restore from iCloud Backup" or "Restore from iTunes Backup" respectively. This will restore all your apps, settings, and data from the last backup. Alternatively, if you're setting up a new iPhone or don't have a backup, select "Set Up as New iPhone." If restoring from a backup, enter your Apple ID and password to authenticate the process. Your iPhone will then download and install the backup data, which may take several minutes depending on the size of the backup and your internet speed. Once restored, you'll be prompted to set up Face ID or Touch ID for biometric security, followed by setting up a passcode for additional security. After these initial steps, you'll be guided through setting up other features such as Apple Pay, Siri, and Location Services. It's also a good idea to review and customize your privacy settings to ensure they align with your preferences. To ensure a smooth transition, consider a few best practices: regularly back up your data to iCloud or iTunes to avoid losing important information in the future. Additionally, update your operating system to the latest version available to benefit from security patches and new features. Finally, organize your home screen by categorizing apps into folders and removing any unnecessary apps to maintain a clutter-free interface. By following these steps meticulously and adopting these best practices, you can quickly get your iPhone up and running as if it were never reset, ensuring minimal disruption to your daily activities. This careful setup process not only helps in restoring all essential data but also enhances the overall user experience by optimizing performance and security.
Restoring Data from iCloud or iTunes Backup
When you've completed the factory reset of your locked iPhone, one of the crucial steps is restoring your data to get back to where you left off. This process can be seamlessly done using either an iCloud or iTunes backup, depending on your preference and the tools at your disposal. **Restoring from iCloud Backup:** To restore from an iCloud backup, start by setting up your iPhone as if it were new. During the setup process, you'll be prompted to select a Wi-Fi network and then choose "Restore from iCloud Backup." Sign in with your Apple ID and password, and then select the backup you want to restore from the list provided. Ensure that your iPhone remains connected to Wi-Fi and powered on throughout the restoration process, as this can take some time depending on the size of your backup and your internet speed. Once complete, your iPhone will be restored with all your apps, settings, and data from the selected backup. **Restoring from iTunes Backup:** If you prefer using iTunes for backup restoration, connect your iPhone to the computer where you've previously backed up your device. Open iTunes and select your iPhone from the top left corner of the screen. Click "Restore Backup" and choose the desired backup from the list. Enter your password if prompted, and then wait for the restoration process to complete. It's essential to keep your iPhone connected to the computer and ensure that both devices remain powered on until the process is finished. **Best Practices:** Regardless of whether you're using iCloud or iTunes, it's crucial to follow some best practices to ensure a smooth restoration. Always make sure that your backups are up-to-date before performing a factory reset. Regularly backing up your data can prevent significant losses in case something goes wrong during the reset process. Additionally, verify that you have enough storage space available on your device or in your iCloud account to accommodate the size of your backup. If you're restoring from an older backup, be aware that some newer apps or features might not be compatible or may require updates after restoration. By carefully following these steps and adhering to these best practices, you can efficiently restore your data after a factory reset and get back to using your iPhone without significant downtime or data loss. This ensures that you can quickly regain access to all your important information and continue using your device as usual.
Securing Your iPhone with New Passcodes and Biometrics
Securing your iPhone with new passcodes and biometrics is a crucial step in the post-reset process, ensuring that your device remains protected from unauthorized access. After performing a factory reset, it's essential to set up robust security measures to safeguard your personal data. Start by creating a strong passcode or password that is unique and not easily guessable. Avoid using common patterns or sequences that could be easily cracked by hackers. For added security, consider enabling the "Erase Data" feature, which will automatically erase all data on your iPhone after ten failed passcode attempts. In addition to traditional passcodes, leveraging biometric authentication can significantly enhance security. If your iPhone supports Face ID or Touch ID, set these features up immediately. Face ID uses advanced facial recognition technology to unlock your device, while Touch ID relies on fingerprint scanning. Both methods offer superior security compared to traditional passcodes because they are more difficult to bypass. Ensure that you enroll multiple faces or fingerprints to account for any variations in appearance or environmental conditions. To further fortify your iPhone's security, enable Two-Factor Authentication (2FA) for your Apple ID. This adds an extra layer of protection by requiring a verification code sent to a trusted device or phone number whenever you sign in from a new location. Regularly update your operating system to ensure you have the latest security patches and features. Also, be cautious with app permissions and only grant access to necessary features to prevent potential data breaches. Moreover, consider using a VPN (Virtual Private Network) when connecting to public Wi-Fi networks to encrypt your internet traffic and protect sensitive information. Regularly back up your data using iCloud or iTunes to prevent loss in case your device is compromised or stolen. Finally, keep an eye on Apple's security updates and best practices guidelines to stay informed about the latest threats and how to mitigate them. By implementing these measures—strong passcodes, biometric authentication, 2FA, regular updates, cautious app permissions, VPN usage, and regular backups—you can significantly enhance the security of your iPhone post-reset. These steps not only protect your personal data but also ensure that your device remains secure against potential threats, providing peace of mind as you continue using your iPhone.