Where To Find Screenshots On Mac
Capturing screenshots on a Mac is an essential skill for anyone looking to document their screen activities, share information, or create visual guides. Whether you're a professional needing to illustrate software tutorials or a casual user wanting to save memorable moments from your screen, knowing where and how to find screenshots on your Mac is crucial. This article will guide you through the process of capturing and managing screenshots on your Mac. We'll start by understanding the basics of screenshots on Mac, including what they are and why they're useful. Next, we'll explore various methods to capture different types of screenshots depending on your needs. Finally, we'll delve into managing and sharing your screenshots effectively. By the end of this article, you'll be well-equipped with all the knowledge you need to master screenshotting on your Mac. Let's begin by understanding the basics of screenshots on Mac.
Understanding the Basics of Screenshots on Mac
In today's digital age, capturing and sharing visual information has become an essential skill for both personal and professional use. One of the most versatile tools available to Mac users is the screenshot. Whether you're documenting a technical issue, sharing a memorable moment, or creating instructional content, understanding how to take screenshots on your Mac can significantly enhance your productivity and communication. This article will delve into the basics of screenshots on Mac, starting with a clear definition of what a screenshot is. We'll explore why taking screenshots is such a valuable practice and examine some common uses that highlight their utility in various contexts. By the end of this guide, you'll be well-equipped to navigate the world of screenshots on your Mac with confidence and precision. So let's dive into Understanding the Basics of Screenshots on Mac.
What is a Screenshot?
A screenshot is a digital image that captures the content displayed on a computer screen at a specific moment. It serves as a visual record of what is currently visible on the screen, including text, images, icons, and other graphical elements. Screenshots are commonly used for various purposes such as documentation, troubleshooting, sharing information with others, and creating tutorials or guides. They can be taken using built-in software tools or third-party applications available for different operating systems. On macOS devices, users can easily capture screenshots using keyboard shortcuts like Command + Shift + 3 to capture the entire screen or Command + Shift + 4 to select a specific area of the screen. The captured images are automatically saved to the desktop by default but can be customized to save in other locations or formats if needed. Understanding how to take and manage screenshots is essential for efficiently navigating and utilizing Mac devices.
Why Take Screenshots?
Taking screenshots is an essential skill in today's digital age, offering a multitude of practical applications that enhance productivity, communication, and documentation. Whether you're a student, professional, or casual user, capturing what's on your screen can be incredibly useful. For instance, if you're working on a project and need to share specific details with colleagues or clients, a screenshot can convey information more effectively than lengthy descriptions. It allows you to highlight important elements such as errors, features, or steps in a process without having to recreate them. Additionally, screenshots serve as valuable references for future use; they can help you keep track of changes over time or document progress in projects. In educational settings, screenshots are indispensable for creating instructional materials and presentations. They enable teachers to illustrate complex concepts visually and provide students with clear examples that enhance understanding. Furthermore, screenshots are crucial for troubleshooting technical issues. By capturing error messages or problematic screens exactly as they appear on your device, you can provide precise information to support teams or forums seeking assistance. This not only speeds up the resolution process but also ensures that the issue is addressed accurately. Moreover, from a creative standpoint, screenshots can be used as inspiration for design projects or as part of artistic compositions. They allow designers to capture elements from various sources and integrate them into their work seamlessly. In summary, taking screenshots is an efficient way to communicate ideas clearly and concisely while providing tangible evidence that supports various tasks across different domains—making it an indispensable tool in our increasingly visual world.
Common Uses of Screenshots
Screenshots are an indispensable tool in today's digital age, offering a myriad of practical applications that enhance productivity, communication, and documentation. One of the most common uses of screenshots is for technical support. When troubleshooting issues with software or hardware, capturing a screenshot can provide a clear visual representation of the problem, making it easier for support teams to diagnose and resolve the issue quickly. This method is particularly useful in remote work environments where physical access to the device is not possible. In the realm of education, screenshots serve as an excellent teaching aid. Educators can capture steps from tutorials or highlight important information from presentations to create comprehensive study materials. Students can also use screenshots to document their progress in projects or to save relevant information from online resources for later reference. For professionals, especially those in marketing and design fields, screenshots are essential for showcasing work samples or demonstrating product features. They can be used in presentations, reports, and proposals to provide visual evidence that supports verbal explanations. Additionally, screenshots are invaluable during brainstorming sessions as they allow team members to share ideas visually without needing to recreate them manually. In personal use cases, screenshots help individuals keep track of important information such as receipts from online purchases or confirmation details for travel bookings. They also serve as a quick way to share funny moments from social media posts or interesting articles with friends and family. Moreover, bloggers and content creators rely heavily on screenshots when writing about software reviews or step-by-step guides. These visual aids make complex instructions more accessible and engaging for readers by breaking down processes into easily understandable parts. Lastly, screenshots play a crucial role in legal documentation by providing irrefutable evidence in cases involving cybercrime or intellectual property disputes. They can be used to capture malicious activity on websites or social media platforms which may otherwise be difficult to prove without visual proof. In summary, screenshots offer versatile functionality that spans across various aspects of modern life—from technical support and education to professional presentations and personal documentation—making them an indispensable tool for anyone who interacts with digital devices regularly.
Methods to Capture Screenshots on Mac
Capturing screenshots on a Mac is an essential skill for both professionals and casual users, allowing you to document important information, share visual content, and troubleshoot issues. This article will delve into three primary methods to capture screenshots on your Mac: using keyboard shortcuts, utilizing the Screenshot app, and leveraging third-party screenshot tools. Each method offers unique advantages and functionalities that cater to different needs and preferences. By understanding these techniques, you can enhance your productivity and streamline your workflow. Whether you're looking for quick captures with keyboard shortcuts, the intuitive interface of the Screenshot app, or the advanced features of third-party tools, this guide will provide comprehensive insights into each approach. Understanding the basics of screenshots on Mac is crucial for maximizing your device's capabilities; let's explore these methods in detail to ensure you're equipped with the knowledge needed to capture screenshots efficiently.
Using Keyboard Shortcuts
Using keyboard shortcuts is a highly efficient way to streamline your workflow and enhance productivity on your Mac. By mastering these shortcuts, you can perform various tasks with speed and precision, saving valuable time in the process. For instance, when capturing screenshots, knowing the right keyboard combinations can make all the difference. To capture a screenshot of your entire screen, simply press Command (⌘) + Shift + 3. This will save the screenshot as a .png file on your desktop. If you want to capture a selected portion of the screen, use Command (⌘) + Shift + 4; this will turn your cursor into a crosshair that allows you to select the area you wish to capture. Moreover, if you need to capture a specific window or menu, press Command (⌘) + Shift + 4 and then press the Spacebar. Your cursor will change into a camera icon that you can click on any window or menu to capture it instantly. Additionally, if you want to save your screenshots directly to the clipboard instead of saving them as files, add Control to any of these combinations—e.g., Command (⌘) + Control + Shift + 3 for capturing the entire screen or Command (⌘) + Control + Shift + 4 for capturing a selected portion. These shortcuts not only simplify screenshot capture but also offer flexibility based on your needs. Furthermore, using keyboard shortcuts extends beyond just screenshots; they can be used for navigating through documents quickly with Command (⌘) + Up/Down arrow keys or switching between open applications with Command (⌘) + Tab. Mastering these shortcuts can significantly boost your efficiency and make working on your Mac more enjoyable and productive. In conclusion, leveraging keyboard shortcuts is an essential skill for any Mac user looking to optimize their workflow. Whether it's capturing screenshots or performing other tasks efficiently, knowing these shortcuts can transform how you interact with your computer. By incorporating these into your daily routine, you'll find yourself accomplishing tasks faster and with greater ease than ever before.
Utilizing the Screenshot App
Utilizing the Screenshot App is one of the most efficient methods to capture screenshots on a Mac. This built-in tool offers a comprehensive suite of features that make it easy to take and manage screenshots. To access the Screenshot App, simply press Command + Shift + 5 on your keyboard, and a toolbar will appear at the bottom of your screen. This toolbar provides various options for capturing different types of screenshots: you can choose to capture the entire screen, a selected window, or a specific portion of the screen. Additionally, you can record your screen by clicking on the video icon in the toolbar. One of the standout features of the Screenshot App is its ability to annotate and edit captured images directly within the app. Once you've taken a screenshot, it will be saved to your desktop by default or to your clipboard if you prefer. You can then open it in Preview or any other image editing software for further customization. The app also allows you to set a timer for delayed screenshots, which can be particularly useful for capturing menus or other transient elements on your screen. Moreover, macOS integrates seamlessly with other Apple devices through Continuity features like Universal Clipboard and AirDrop. This means that screenshots taken on one device can be easily accessed and shared across all connected devices in your ecosystem. For instance, if you take a screenshot on your iPhone or iPad while connected to your Mac via iCloud, you can instantly access that image on any other device linked to the same account. The Screenshot App also supports advanced functionalities such as capturing scrolling screenshots and creating GIFs from screen recordings. These features are especially beneficial for professionals who need detailed visual documentation or for educators looking to create instructional content. In summary, utilizing the Screenshot App on Mac offers an intuitive and powerful way to capture and manage screenshots efficiently. Its robust set of features combined with seamless integration across Apple devices makes it an indispensable tool for both casual users and professionals alike. Whether you're documenting software issues, creating tutorials, or simply sharing moments from your screen with others, this app provides everything you need right at your fingertips.
Third-Party Screenshot Tools
Third-party screenshot tools offer a robust and versatile alternative to the built-in screenshot capabilities on Mac. These tools provide advanced features that cater to various needs, from simple captures to complex editing and annotation. One popular option is Snagit, which allows users to capture entire web pages, record video screenshots, and edit images with a wide range of tools. Another tool is Skitch, known for its intuitive interface and powerful annotation features that make it easy to highlight important details in screenshots. For those who require more control over their captures, tools like Monosnap offer customizable hotkeys and the ability to upload screenshots directly to cloud storage services like Dropbox or Google Drive. Additionally, tools like Lightshot provide quick access to screenshotting with just two clicks and offer instant sharing options via social media or email. These third-party tools not only enhance the functionality of capturing screenshots but also streamline the process of organizing and sharing them efficiently. By leveraging these advanced features, users can elevate their productivity and creativity when working with screenshots on their Macs.
Managing and Sharing Your Screenshots
In today's digital age, screenshots have become an indispensable tool for communication, documentation, and collaboration. Whether you're capturing a memorable moment from a video, illustrating a point in a presentation, or troubleshooting an issue on your computer, screenshots are essential. However, managing and sharing these visual snippets can be as important as taking them. This article delves into the critical aspects of screenshot management: understanding where screenshots are saved on your device, learning how to edit and enhance them for clarity and impact, and mastering the various methods for sharing them with others. By grasping these fundamental concepts, you'll be better equipped to harness the full potential of screenshots in your personal and professional life. Understanding the basics of screenshots on Mac is just the beginning; let's dive deeper into managing and sharing your screenshots effectively.
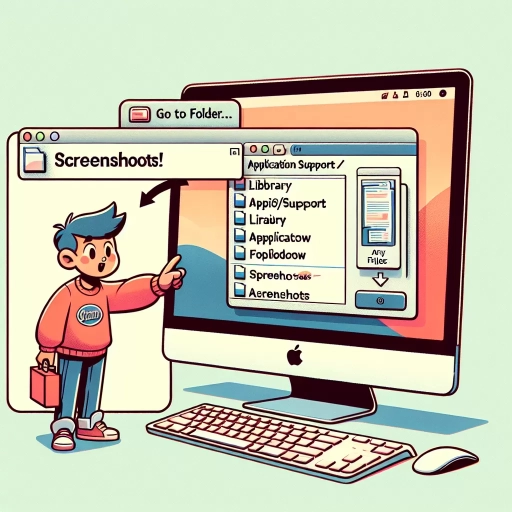
Where Screenshots are Saved
When managing and sharing your screenshots, it's crucial to know where they are saved on your Mac. By default, macOS saves screenshots to the desktop, making them easily accessible for immediate use or further organization. This default location ensures that you can quickly locate and manage your screenshots without having to navigate through various folders. However, if you prefer a more organized approach, macOS allows you to change the default save location. You can do this by using Terminal commands or third-party applications designed for screenshot management. For instance, using Terminal, you can set a custom directory where all your screenshots will be saved automatically. This flexibility is particularly useful for professionals who take numerous screenshots daily and need them organized in specific folders for projects or clients. Moreover, understanding where screenshots are saved helps streamline your workflow. If you're working on a collaborative project and need to share screenshots frequently, knowing their exact location saves time and reduces confusion. You can easily drag and drop them into emails, messaging apps, or cloud storage services like Google Drive or Dropbox. Additionally, if you're using cloud services like iCloud Photos or Google Photos for storage and synchronization across devices, being aware of where screenshots are stored locally helps in ensuring they sync correctly across all platforms. Incorporating good practices such as naming conventions and categorizing folders can further enhance screenshot management. For example, creating separate folders for different projects or tasks keeps everything neatly organized and makes it simpler to find specific screenshots when needed. This structured approach not only improves productivity but also reduces clutter on your desktop. Furthermore, some applications offer built-in screenshot management features that allow you to save screenshots directly within the app itself rather than relying on the default save location. Tools like Skitch or Snagit provide robust options for annotating and organizing screenshots before sharing them with others. These tools often include features such as tagging, categorization, and direct sharing capabilities which make managing large volumes of screenshots much easier. In conclusion, knowing where screenshots are saved is fundamental when it comes to managing and sharing them effectively on a Mac. Whether you stick with the default desktop save location or opt for a custom directory setup through Terminal commands or third-party apps, understanding this aspect ensures that you can efficiently locate, organize, and share your screenshots as needed. By leveraging these strategies alongside good organizational practices and utilizing specialized screenshot management tools when necessary, you'll be able to handle even the most demanding screenshot-related tasks with ease.
Editing and Enhancing Screenshots
Editing and enhancing screenshots is an essential step in managing and sharing your visual content effectively. Whether you're a professional designer, a tech blogger, or simply someone who frequently captures images from your screen, knowing how to edit screenshots can significantly improve their quality and impact. The process begins with selecting the right tool for the job; popular options include built-in software like Preview on Macs, or third-party applications such as Adobe Photoshop or specialized screenshot editors like Snagit. Once you've chosen your tool, you can start by cropping out unnecessary parts of the image to focus attention on key elements. Adjusting brightness, contrast, and saturation can also enhance the overall clarity and aesthetic appeal of the screenshot. Adding annotations is another powerful way to enhance screenshots. Tools like arrows, text boxes, and highlighters allow you to draw attention to specific features or explain complex concepts more clearly. For instance, if you're creating a tutorial on how to use a particular software feature, annotating each step with arrows and text can make it much easier for viewers to follow along. Additionally, blurring out sensitive information such as passwords or personal data ensures that your screenshots remain secure while still conveying necessary information. Furthermore, resizing images without losing quality is crucial when sharing screenshots across different platforms. This ensures that your images look sharp whether they're being viewed on a high-resolution monitor or a mobile device. Some editing tools also offer batch processing features which allow you to apply edits across multiple screenshots simultaneously—saving time and effort when working with large collections of images. Incorporating visual elements such as icons, logos, or even custom graphics can further personalize your screenshots and align them with your brand identity. This is particularly useful for businesses looking to maintain consistency in their marketing materials or educational content. Moreover, adding watermarks can protect your intellectual property by making it difficult for others to use your edited screenshots without permission. Finally, saving edited screenshots in appropriate formats (such as PNG for transparent backgrounds or JPEG for smaller file sizes) ensures they are optimized for their intended use—whether that's embedding them into documents, uploading them online, or sharing via email attachments. By mastering these editing techniques and leveraging the right tools available at your disposal—both free and paid—you can transform raw captures into polished visuals that communicate effectively and engage audiences more profoundly.
Sharing Screenshots with Others
Sharing screenshots with others is a seamless process that can enhance collaboration, communication, and creativity. Whether you're working on a project, sharing tips, or simply wanting to show off your latest gaming achievement, there are multiple ways to share your screenshots efficiently. On macOS, once you've captured a screenshot using the Command + Shift + 3 or Command + Shift + 4 shortcuts, it automatically saves to your desktop as a .png file. You can then easily drag and drop this file into an email or messaging app like Mail or Messages. For more immediate sharing, macOS integrates well with social media platforms and cloud storage services such as iCloud Photo Library, Google Drive, and Dropbox. Simply right-click on the screenshot and select "Share" to access these options directly from Finder. If you prefer a more streamlined approach without cluttering your desktop with temporary files, consider using the Preview app. Open your screenshot in Preview and use the "Share" menu to send it via email or AirDrop directly to another Mac user nearby. This method ensures that your screenshots are organized within the app rather than scattered across your desktop. For those who frequently share screenshots for professional purposes—such as designers collaborating on projects—tools like Slack or Trello can be invaluable. These platforms allow you to upload images directly into chat channels or boards where team members can view and comment on them instantly. Additionally, services like Snagit offer advanced features for annotating and editing screenshots before sharing them with colleagues. In today's digital age where visual communication is paramount, being able to share screenshots quickly and effectively is crucial for productivity and efficiency. By leveraging macOS's built-in tools along with third-party applications designed specifically for image sharing and collaboration, you can ensure that your visual messages reach their intended audience promptly without any hassle. Whether it's for personal use or professional collaboration, mastering the art of sharing screenshots will undoubtedly streamline your workflow while enhancing overall communication quality.