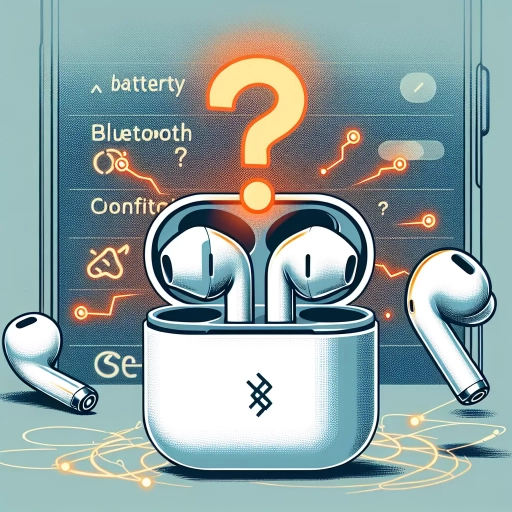
Why Are My Airpods Flashing Orange
If you've noticed your AirPods flashing orange, it can be both puzzling and concerning. This unusual indicator often signals an issue that needs attention, but understanding its meaning and resolving the problem can be straightforward with the right guidance. In this article, we will delve into the reasons behind the orange flashing light on your AirPods, starting with a foundational understanding of the various indicators these devices use. We will then explore common causes for this specific issue and provide step-by-step troubleshooting tips to help you identify and fix the problem. Finally, we will offer advanced solutions and maintenance tips to ensure your AirPods continue to function optimally. By the end of this article, you'll be equipped with the knowledge to diagnose and resolve the orange flashing light, ensuring your listening experience remains seamless. Let's begin by **Understanding the Basics of AirPods Indicators**.
Understanding the Basics of AirPods Indicators
In the modern era of wireless earbuds, Apple's AirPods have become a staple for many users, offering convenience and seamless integration with Apple devices. However, understanding the indicators on your AirPods can be crucial for optimal use and troubleshooting. These small lights embedded in the charging case provide vital information about the status of your AirPods, but deciphering their meanings can be confusing for some users. This article aims to demystify the basics of AirPods indicators by exploring three key aspects: **What Do Different Light Colors Mean?**, which delves into the significance of various light hues; **How to Interpret the Flashing Patterns**, which explains the different sequences and what they signify; and **Common Issues Indicated by Light Colors**, which helps identify potential problems based on the light signals. By grasping these fundamental concepts, you will be better equipped to manage your AirPods effectively and troubleshoot common issues. Understanding the basics of AirPods indicators is essential for maximizing your user experience, and this guide will walk you through each step to ensure you are well-informed and empowered to get the most out of your AirPods.
1. What Do Different Light Colors Mean?
When it comes to understanding the indicators on your AirPods, one of the key aspects to grasp is the meaning behind different light colors. These lights serve as a communication tool, providing you with essential information about the status of your AirPods. Here’s a breakdown of what each color signifies: - **White Light**: A white light typically indicates that your AirPods are ready to pair with a device. This is often seen when you open the charging case and the AirPods are in pairing mode, awaiting connection to your iPhone, iPad, or other compatible device. - **Orange Light**: An orange light is a common indicator that your AirPods need to be reset or that there is an issue with the pairing process. If you see an orange light, it may mean that your AirPods are not properly connected to your device or that they require a reset to resolve any connectivity issues. - **Green Light**: A green light usually signifies that your AirPods are fully charged and ready for use. This color can be seen both on the charging case and on the AirPods themselves when they are placed inside the case. It’s a reassuring sign that you have enough battery life to enjoy your music or take calls without interruption. - **Amber Light**: An amber light, which is slightly different from orange, often indicates that the battery level of your AirPods is low. This warning light tells you that it’s time to recharge your AirPods to avoid running out of power during use. Understanding these light colors can significantly enhance your user experience with AirPods. For instance, if you notice an orange light flashing, it might prompt you to check the pairing settings or reset your AirPods to resolve any connectivity issues. Similarly, seeing a green light can give you peace of mind knowing that your AirPods are fully charged and ready for use. By recognizing these visual cues, you can troubleshoot common problems and ensure seamless functionality of your AirPods. This knowledge is particularly useful when troubleshooting issues such as why your AirPods might be flashing orange, helping you identify and address the problem efficiently.
2. How to Interpret the Flashing Patterns
When it comes to understanding the basics of AirPods indicators, interpreting the flashing patterns is crucial for diagnosing and resolving common issues. The flashing lights on your AirPods serve as a visual communication system, providing insights into their status and any potential problems. Here’s how to decipher these patterns: 1. **Flashing White Light**: This is typically seen when you open the AirPods case near an iPhone or other Apple device. It indicates that the AirPods are ready to pair with your device. If you see a flashing white light while trying to connect, it means the pairing process is in progress. 2. **Flashing Amber or Orange Light**: An amber or orange light usually signals that there is an issue with the AirPods. This could mean that the AirPods are not fully charged, there is a problem with the firmware, or they are having trouble connecting to your device. If you see this light, try resetting your AirPods by placing them in their case, closing the lid, waiting for 30 seconds, and then opening it again. 3. **Flashing Green Light**: A steady green light indicates that the AirPods are fully charged and ready for use. However, if you see a flashing green light, it might mean that the AirPods are in pairing mode but not yet connected to a device. 4. **No Light at All**: If there is no light visible when you open the case, it could indicate that the AirPods are completely out of battery or there might be a hardware issue. Try charging the case for at least 15 minutes and then check again. Understanding these flashing patterns can help you troubleshoot common issues such as connectivity problems, low battery warnings, and pairing difficulties. For instance, if your AirPods are flashing orange and you've tried resetting them without success, it may be worth checking for any software updates or contacting Apple support for further assistance. By recognizing and interpreting these visual cues, you can quickly identify what’s going on with your AirPods and take appropriate action to resolve any issues efficiently. This knowledge not only enhances your user experience but also helps in maintaining the optimal performance of your AirPods over time.
3. Common Issues Indicated by Light Colors
When it comes to understanding the basics of AirPods indicators, it's crucial to decipher the meanings behind different light colors, as they serve as vital communication tools between your AirPods and you. Among these indicators, light colors often signal specific issues or statuses that require your attention. Here are three common issues indicated by light colors: 1. **Orange Light**: An orange light typically signifies that your AirPods are experiencing a problem with pairing or connectivity. This could mean that the AirPods are not properly connected to your device or that there is an issue with the charging case. If you see an orange light, try resetting your AirPods by placing them in their case, closing the lid, waiting for 30 seconds, and then opening the lid again. This simple reset often resolves connectivity issues. 2. **Red Light**: A red light usually indicates a low battery level or a charging issue. If you see a red light when you open the charging case, it means that the case itself is running low on battery and needs to be charged. Conversely, if you see a red light while charging your AirPods, it might suggest that there is an issue with the charging process, such as dirt or debris obstructing the charging contacts. 3. **Amber or Yellow Light**: An amber or yellow light can indicate that your AirPods are in the process of resetting or updating their firmware. This light color is also seen during the initial setup process when you first pair your AirPods with a device. If you notice an amber light persistently, it could mean that there is an ongoing issue with the firmware update process, and you might need to restart the setup process or seek further assistance from Apple support. Understanding these light colors is essential for troubleshooting common issues with your AirPods. By recognizing what each color signifies, you can take appropriate steps to resolve problems quickly and efficiently, ensuring that your AirPods continue to function optimally. Whether it's a connectivity issue signaled by an orange light, a low battery indicated by a red light, or a firmware update shown by an amber light, being aware of these indicators empowers you to maintain your AirPods in top condition. This knowledge not only enhances your user experience but also helps in prolonging the lifespan of your AirPods by addressing potential problems early on.
Troubleshooting Common Causes for Orange Flashing
When your AirPods start flashing orange, it can be a puzzling and frustrating experience, especially if you're not sure what the indicator means. This article aims to demystify the common causes behind the orange flashing light on your AirPods, providing you with practical troubleshooting steps to resolve the issue quickly. We will delve into three primary reasons for this indicator: low battery or charging issues, connectivity problems with devices, and the need for a firmware update or reset. By understanding these potential causes, you'll be better equipped to diagnose and fix the problem efficiently. Whether you're experiencing intermittent connectivity, charging difficulties, or software-related glitches, this guide will walk you through each scenario in detail. By the end of this article, you'll not only know how to troubleshoot the orange flashing light but also gain a deeper understanding of the basics of AirPods indicators, empowering you to manage your wireless earbuds with confidence.
1. Low Battery or Charging Issues
When your AirPods are flashing orange, one of the most common causes to consider is a low battery or charging issue. This indicator often signals that your AirPods are either running out of power or are experiencing difficulties during the charging process. To troubleshoot this, start by checking the battery level of your AirPods. If they are low, simply place them in their charging case and ensure the case itself has sufficient charge. Sometimes, the charging case might be depleted, preventing your AirPods from charging properly. If your AirPods are not charging even when placed in the case, there could be an issue with the charging port or the cable. Inspect the Lightning port on the charging case for any debris or dust that might be obstructing the connection. Clean out any dirt using a soft cloth or a small brush. Additionally, ensure that the charging cable is not damaged and is properly connected to both the charging case and the power source. Another potential cause is a faulty charging case. If you've tried different cables and power sources without success, it may be worth trying another charging case if possible. This will help determine whether the issue lies with the case or the AirPods themselves. In some cases, software issues can also affect charging behavior. Restarting your AirPods can sometimes resolve these problems. To do this, place your AirPods in their charging case, close the lid, and wait for about 30 seconds before reopening it. This simple reset can often resolve minor software glitches that might be causing charging issues. Lastly, if none of these steps resolve the problem, it may indicate a hardware issue with either the AirPods or the charging case. In such cases, contacting Apple support or visiting an authorized service provider for further diagnosis and repair might be necessary. By systematically addressing these potential causes—checking battery levels, ensuring proper connections, cleaning ports, testing with different accessories, and performing software resets—you can effectively troubleshoot and often resolve low battery or charging issues that result in orange flashing on your AirPods. This methodical approach helps you identify and fix the root cause efficiently, getting your AirPods back to optimal functioning state.
2. Connectivity Problems with Devices
When troubleshooting the common issue of AirPods flashing orange, one critical area to focus on is connectivity problems with devices. The orange flashing light typically indicates that your AirPods are in pairing mode, but if they fail to connect or maintain a stable connection, it can be frustrating. Here are some key points to consider: 1. **Device Compatibility**: Ensure that your AirPods are compatible with the device you're trying to pair them with. While AirPods work seamlessly with Apple devices, compatibility issues can arise when pairing with non-Apple products. Check the device's Bluetooth settings and ensure it supports the necessary protocols. 2. **Bluetooth Interference**: Other Bluetooth devices in the vicinity can interfere with your AirPods' connection. Try moving away from other Bluetooth-enabled devices or turning them off temporarily to see if the issue resolves. 3. **Pairing Process**: Sometimes, the pairing process itself might be flawed. Restart both your AirPods and the device you're trying to pair them with. Then, put your AirPods in their case, close the lid, and wait for about 10 seconds before opening it again and starting the pairing process anew. 4. **Software Updates**: Outdated software on either your AirPods or the device can cause connectivity issues. Make sure both are updated to the latest versions. For Apple devices, go to Settings > General > Software Update to check for any available updates. 5. **Resetting AirPods**: If all else fails, resetting your AirPods might be necessary. To do this, place your AirPods in their case and close the lid. Wait for about 30 seconds, then open the lid and go to Settings > Bluetooth on your device. Find your AirPods in the list of devices and tap the "i" icon next to them. Select "Forget Device" and confirm. Then, put your AirPods back in their case and start the pairing process again from scratch. 6. **Physical Obstructions**: Physical obstructions between your AirPods and the device can disrupt the connection. Ensure there are no objects blocking the line of sight between them. 7. **Battery Levels**: Low battery levels can affect connectivity. Charge your AirPods for at least 30 minutes before attempting to pair them again. By systematically addressing these potential causes of connectivity problems, you can often resolve the issue of your AirPods flashing orange and establish a stable connection with your device. Remember that patience and a methodical approach are key when troubleshooting these issues.
3. Firmware Update or Reset Needed
When your AirPods are flashing orange, it often indicates a connectivity issue or a problem with the pairing process. One of the most effective troubleshooting steps in such cases is to perform a firmware update or reset. Here’s why and how you can do it: **Firmware Update:** Sometimes, the orange flashing light can be a sign that your AirPods are due for a firmware update. Apple periodically releases updates to improve performance, fix bugs, and enhance compatibility. To check for updates, ensure your AirPods are connected to your iPhone or iPad. Open the Settings app, go to Bluetooth, and tap the "i" icon next to your AirPods. If an update is available, it will automatically download and install when your AirPods are connected to your device and in their charging case. This process usually happens in the background, but manually checking can help resolve any issues caused by outdated firmware. **Resetting Your AirPods:** If updating the firmware doesn’t resolve the issue, resetting your AirPods might be necessary. Resetting will erase all settings and pairing information, allowing you to start fresh. To reset your AirPods, place them in their charging case and close the lid. Wait for about 30 seconds, then open the lid. On your iPhone or iPad, go to Settings > Bluetooth and find your AirPods in the list. Tap the "i" icon next to them and select "Forget Device." Next, press and hold the setup button on the back of the charging case until the status light flashes amber. Release the button when it starts flashing white; this indicates that your AirPods are in pairing mode again. Now, you can reconnect them to your device by opening the charging case near your iPhone or iPad and following the on-screen instructions. **Why It Works:** Resetting or updating firmware addresses common causes of connectivity issues such as corrupted data or outdated software that might be causing the orange flashing light. By resetting, you clear out any problematic settings that could be interfering with proper pairing. Similarly, updating firmware ensures that any known bugs or compatibility issues are fixed, leading to smoother operation and resolving the flashing orange light. In summary, if your AirPods are flashing orange and you've tried other troubleshooting steps without success, performing a firmware update or resetting them can often resolve the issue. These steps are straightforward and can significantly improve the performance and connectivity of your AirPods. By ensuring your firmware is up-to-date and resetting when necessary, you can enjoy uninterrupted listening and seamless connectivity with your devices.
Advanced Solutions and Maintenance Tips
In today's fast-paced world, maintaining and optimizing your tech gadgets is crucial for seamless performance. For AirPods users, understanding advanced solutions and maintenance tips can significantly enhance the overall listening experience. This article delves into three essential areas to keep your AirPods in top condition: resetting them to factory settings, updating firmware and software, and cleaning and maintaining the devices. By mastering these techniques, you can troubleshoot common issues, ensure compatibility with the latest technology, and extend the lifespan of your AirPods. Whether you're dealing with connectivity problems, outdated software, or dirt accumulation, these tips will guide you through the process step-by-step. After grasping these advanced solutions, you'll be better equipped to understand the basics of AirPods indicators, allowing you to diagnose and resolve issues more efficiently. Dive into this comprehensive guide to elevate your AirPods experience and ensure they continue to perform at their best.